Video Overview
Instructional PDF 3 pages
Editor’s notes
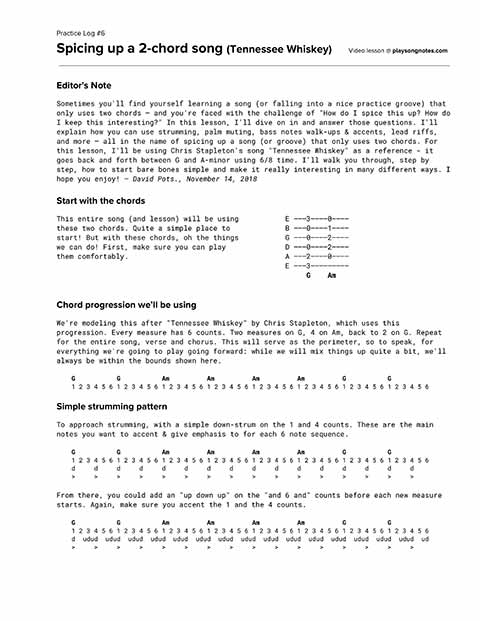
Sometimes you’ll find yourself learning a song (or falling into a nice practice groove) that only uses two chords – and you’re faced with the challenge of “How do I spice this up? How do I keep this interesting?” In this lesson, I’ll dive on in and answer those questions. I’ll explain how you can use strumming, palm muting, bass notes walk-ups & accents, lead riffs, and more – all in the name of spicing up a song (or groove) that only uses two chords. For this lesson, I’ll be using Chris Stapleton’s song “Tennessee Whiskey” as a reference - it goes back and forth between G and A-minor using 6/8 time. I’ll walk you through, step by step, how to start bare bones simple and make it really interesting in many different ways. I hope you enjoy!
Quick note, this lesson is inspired by a similar lesson made by YouTube guitar teacher Sean Daniel - in which he looks at the Fleetwood Mac song “Dreams” that goes between F and G the entire time (he offers many good tips for spicing it up). I recommend his channel, check it out!
Start with the chords
This entire song (and lesson) will be using these two chords. Quite a simple place to start! But with these chords, oh the things we can do! First, make sure you can play them comfortably.
E –––3––––0––––
B –––0––––1––––
G –––0––––2––––
D –––0––––2––––
A –––2––––0––––
E –––3–––––––––
     G    Am
Chord progression we’ll be using
We’re modeling this after “Tennessee Whiskey” by Chris Stapleton, which uses this progression. Every measure has 6 counts. Two measures on G, 4 on Am, back to 2 on G. Repeat for the entire song, verse and chorus. This will serve as the perimeter, so to speak, for everything we’re going to play going forward: while we will mix things up quite a bit, we’ll always be within the bounds shown here.
G           G           Am          Am          Am          Am          G           G
1 2 3 4 5 6 1 2 3 4 5 6 1 2 3 4 5 6 1 2 3 4 5 6 1 2 3 4 5 6 1 2 3 4 5 6 1 2 3 4 5 6 1 2 3 4 5 6
Simple strumming
To approach strumming, with a simple down-strum on the 1 and 4 counts. These are the main notes you want to accent & give emphasis to for each 6 note sequence.
G           G           Am          Am          Am          Am          G           G
1 2 3 4 5 6 1 2 3 4 5 6 1 2 3 4 5 6 1 2 3 4 5 6 1 2 3 4 5 6 1 2 3 4 5 6 1 2 3 4 5 6 1 2 3 4 5 6
d     d     d     d     d     d     d     d     d     d     d     d     d     d     d     d
>     >     >     >     >     >     >     >     >     >     >     >     >     >     >     >
From there, you could add an “up down up” on the “and 6 and” counts before each new measure starts. Again, make sure you accent the 1 and the 4 counts.
G           G           Am          Am          Am          Am          G           G
1 2 3 4 5 6 1 2 3 4 5 6 1 2 3 4 5 6 1 2 3 4 5 6 1 2 3 4 5 6 1 2 3 4 5 6 1 2 3 4 5 6 1 2 3 4 5 6
d  udud  udud  udud  udud  udud  udud  udud  udud  udud  udud  udud  udud  udud  udud  udud  ud
>     >     >     >     >     >     >     >     >     >     >     >     >     >     >     >
Plucking the bass note of each chord
Let’s move away from strumming for a moment. Instead of any strumming patttern, use this tab when playing each chord. Pluck the bass note on the 1 count, and strum the rest of the chord on the 4 count.
E ––––––––3–––––     E ––––––––0––––––
B ––––––––0–––––     B ––––––––1––––––
G ––––––––0–––––     G ––––––––2––––––
D ––––––––0–––––     D ––––––––2––––––
A ––––––––2–––––     A ––0––––––––––––
E ––3–––––––––––     E –––––––––––––––
    G                    Am
    1 2 3 4 5 6          1 2 3 4 5 6
          >                    >
Also, if you can, silence the chord immediately after the 4 count. Do this by touching either your left or right hand lightly against all the strings (release the chord shape with your left hand, even if you keep your fingers touching the strings).
E ––––––––3–x–––     E ––––––––0–x––––
B ––––––––0–x–––     B ––––––––1–x––––
G ––––––––0–x–––     G ––––––––2–x––––
D ––––––––0–x–––     D ––––––––2–x––––
A ––––––––2–x–––     A ––0–––––––x––––
E ––3–––––––x–––     E –––––––––––––––
    G                    Am
    1 2 3 4 5 6          1 2 3 4 5 6
          >                    >
Here’s what the full sequence would look like, using this style:
E ––––––––3–x–––––––––3–x–––––––––0–x–––––––––0–x–––––––––0–x–––––––––0–x–––––––––3–x–––––––––3–x–––
B ––––––––0–x–––––––––0–x–––––––––1–x–––––––––1–x–––––––––1–x–––––––––1–x–––––––––0–x–––––––––0–x–––
G ––––––––0–x–––––––––0–x–––––––––2–x–––––––––2–x–––––––––2–x–––––––––2–x–––––––––0–x–––––––––0–x–––
D ––––––––0–x–––––––––0–x–––––––––2–x–––––––––2–x–––––––––2–x–––––––––2–x–––––––––0–x–––––––––0–x–––
A ––––––––2–x–––––––––2–x–––0–––––––x–––0–––––––x–––0–––––––x–––0–––––––x–––––––––2–x–––––––––2–x–––
E ––3–––––––x–––3–––––––x–––––––––––––––––––––––––––––––––––––––––––––––––––3–––––––x–––3–––––––x–––
    G           G           Am          Am          Am          Am          G           G
    1 2 3 4 5 6 1 2 3 4 5 6 1 2 3 4 5 6 1 2 3 4 5 6 1 2 3 4 5 6 1 2 3 4 5 6 1 2 3 4 5 6 1 2 3 4 5 6
Walking up into the bass note of each chord
Instead of playing each chord with a single down strum, walk into it via the E string. This open E string comes on the “6” count just before the “1” count (of which the proper bass note of the actual chord occurs).
E –––––––––3–x–––     E ––––––––––0–x––––
B –––––––––0–x–––     B ––––––––––1–x––––
G –––––––––0–x–––     G ––––––––––2–x––––
D –––––––––0–x–––     D ––––––––––2–x––––
A –––––––––2–x–––     A ––––0–––––––x––––
E –0–3–––––––x–––     E ––0––––––––––––––
     G                      Am
   6 1 2 3 4 5 6          6 1 2 3 4 5 6
           >                      >
With this, the full sequence would be:
E ––––––––3–x–––––––––3–x–––––––––0–x–––––––––0–x–––––––––0–x–––––––––0–x–––––––––3–x–––––––––3–x––––
B ––––––––0–x–––––––––0–x–––––––––1–x–––––––––1–x–––––––––1–x–––––––––1–x–––––––––0–x–––––––––0–x––––
G ––––––––0–x–––––––––0–x–––––––––2–x–––––––––2–x–––––––––2–x–––––––––2–x–––––––––0–x–––––––––0–x––––
D ––––––––0–x–––––––––0–x–––––––––2–x–––––––––2–x–––––––––2–x–––––––––2–x–––––––––0–x–––––––––0–x––––
A ––––––––2–x–––––––––2–x–––0–––––––––––0–––––––––––0–––––––––––0–––––––––––––––––2–x–––––––––2–x––––
E ––3–––––––––0–3–––––––––0–––––––––––0–––––––––––0–––––––––––0–––––––––––0–3–––––––––0–3–––––––––0––
    G           G           Am          Am          Am          Am          G           G
    1 2 3 4 5 6 1 2 3 4 5 6 1 2 3 4 5 6 1 2 3 4 5 6 1 2 3 4 5 6 1 2 3 4 5 6 1 2 3 4 5 6 1 2 3 4 5 6
Using an A-minor7
Another small (but effective) way to add some variation to this is to use an A-minor7 for the final two measures of A-minor.
E ––––––––3–x–––––––––3–x–––––––––0–x–––––––––0–x–––––––––3–x–––––––––3–x–––––––––3–x–––––––––3–x––––
B ––––––––0–x–––––––––0–x–––––––––1–x–––––––––1–x–––––––––1–x–––––––––1–x–––––––––0–x–––––––––0–x––––
G ––––––––0–x–––––––––0–x–––––––––2–x–––––––––2–x–––––––––0–x–––––––––0–x–––––––––0–x–––––––––0–x––––
D ––––––––0–x–––––––––0–x–––––––––2–x–––––––––2–x–––––––––2–x–––––––––2–x–––––––––0–x–––––––––0–x––––
A ––––––––2–x–––––––––2–x–––0–––––––––––0–––––––––––0–––––––––––0–––––––––––––––––2–x–––––––––2–x––––
E ––3–––––––––0–3–––––––––0–––––––––––0–––––––––––0–––––––––––0–––––––––––0–3–––––––––0–3–––––––––0––
    G           G           Am          Am          Am7         Am7         G           G
    1 2 3 4 5 6 1 2 3 4 5 6 1 2 3 4 5 6 1 2 3 4 5 6 1 2 3 4 5 6 1 2 3 4 5 6 1 2 3 4 5 6 1 2 3 4 5 6
Adding the G => C/G strum
For the final two measures of G, here’s a great way to add in some heavier strumming into a Gsus4 (aka C/G).
––––––––––––––3–––––3–3–––3–––––3–3–3–3–––––3–3–3––|–––––
––––––––––––––0h1–––1–1–––0–––––0–0–0–0–––––0–0–0––|–––––
––––––––––––––0–––––0–0–––0–––––0–0–0–0–––––0–0–0––|–––––
––––––––––––––0h2–––2–2–––0–––––0–0–0–0–––––0–0–0––|–––––
––––––––––––––x–x–––x–x–––x–––––x–x–x–x–––––x–x–x––|–––––
––3–––––––––––3–––––3–3–––3–––––3–3–3–3–––––3–3–3––|–0–––
  G           G/C         G
  1 + 2 + 3 + 4 + 5 + 6 + 1 + 2 + 3 + 4 + 5 + 6 +    1 +
The full sequence would roughly look like this:
E ––––––––3–x–––––––––3–x–––––––––0–x–––––––––0–x–––––––––3–x–––––––––3–x–––––––––3–3–––3–––3–3––––––
B ––––––––0–x–––––––––0–x–––––––––1–x–––––––––1–x–––––––––1–x–––––––––1–x–––––––––0–1–––0–––0–0––––––
G ––––––––0–x–––––––––0–x–––––––––2–x–––––––––2–x–––––––––0–x–––––––––0–x–––––––––0–0–––0–––0–0––––––
D ––––––––0–x–––––––––0–x–––––––––2–x–––––––––2–x–––––––––2–x–––––––––2–x–––––––––0–2–––0–––0–0––––––
A ––––––––2–x–––––––––2–x–––0–––––––––––0–––––––––––0–––––––––––0–––––––––––––––––x–x–––x–––2–2––––––
E ––3–––––––––0–3–––––––––0–––––––––––0–––––––––––0–––––––––––0–––––––––––0–3–––––––––––3–––––––––0––
    G           G           Am          Am          Am7         Am7         G      C/G  G
    1 2 3 4 5 6 1 2 3 4 5 6 1 2 3 4 5 6 1 2 3 4 5 6 1 2 3 4 5 6 1 2 3 4 5 6 1 2 3 4 5 6 1 2 3 4 5 6
Adding discretionary strumming
A final piece of advice for strumming: add more as you please! As long as you emphasize the 1 and 4 counts, any amount of extra strumming will sound fine. Try to get your hand going in a continuous down-up-down-up-down-up motion, and only bring it into the strings as you choose to - even if that means light brushes.
Adding lead riffs
Finally, here are some lead riffs you can freely incorporate as you transition into each new chord. Use these as heavily or sparingly as you please, whether you decide to mix them in with your strumming (which is tough) or play them without any attempt at strumming (which is fine too).
E ––––––––––––––––3––   ––––––––––––––––––––0––   ––––––––––––––––––0––   –––––––––––––––––3––
B ––––––––––––––––0––   ––––––––––––––––––––1––   ––––––––––––––––––1––   –––––––––––––––––0––
G –––––––0––2/4–––0––   –––4––2––0––––4/2–––2––   –––4––4––4––4–2–––2––   –––4––2––0–2–0–––0––
D ––0––2––––––––––0––   ––––––––––––––––––––2––   ––––––––––––––––––2––   –––––––––––––––––0––
A ––––––––––––––––2––   ––––––––––––––––––––0––   ––––––––––––––––––0––   –––––––––––––––––2––
E ––––––––––––––––3––   –––––––––––––––––––––––   –––––––––––––––––––––   –––––––––––––––––3––
                  G                         Am                      Am                     G
Good luck!
I hope this helps! My general closing advice would be to combine all the different techniques I show above to make this G-Am transition one that never feels boring or monotonous. As always, see my video lesson for reference.

Browse Related Lessons
Click any tag below to view other lessons I've made in that category:
Enjoy My Lessons? Show Your Support!
Most of the lessons on my website are 100% free. If you have the means, please show your support with a tip jar contribution. I put many hours into every lesson — but it only takes you a minute to make a donation. You have my thanks!
Looking for More Song Lessons?
Featured Courses
Fun & Helpful Tools I've Made
Coming soon is Jambox – which shows all the video jam tracks I've made. It's note quite ready for the spotlight, but check it out if you like!
Subscribe to my YouTube channel
Be sure to never miss a lesson by subscribing on YouTube. I put out 2-3 new videos every week. These include full song lessons, as well as covers, practice tips, behind-the-scenes updates. Thanks!
Recent Lessons
-
July 3, 2026
"Ramble On" by Led Zeppelin (full song lesson)
-
June 21, 2026
Dad-Inspired Songs for Father's Day
-
June 12, 2026
"Ramble On" Acoustic Bassline Groove (Led Zeppelin)
-
June 6, 2026
Melody, with Chords: "Love Me Tender"
-
June 5, 2026
"Love Me Tender" as played by Elvis Presley
-
May 29, 2026
Learning Triads with "Happy Birthday" (Key of G)
-
May 19, 2026
Guitar Jam Tracks: How I Make Them!
-
May 4, 2026
New and Improved! Song List Update.
-
April 24, 2026
Country Fingerstyle, Melody + Bass (feat. "Live Forever" by Billy Joe Shaver)