Chord charts (or chord diagrams) are a type of fretboard diagram which show where to put fretting-hand fingers in order to form a chord shape.
Dots (representing fingers) are shown on top of vertical lines (representing strings), in between horizontal lines (representing frets). Chord charts can quickly show the layout of any chord shape, without using number or letters.
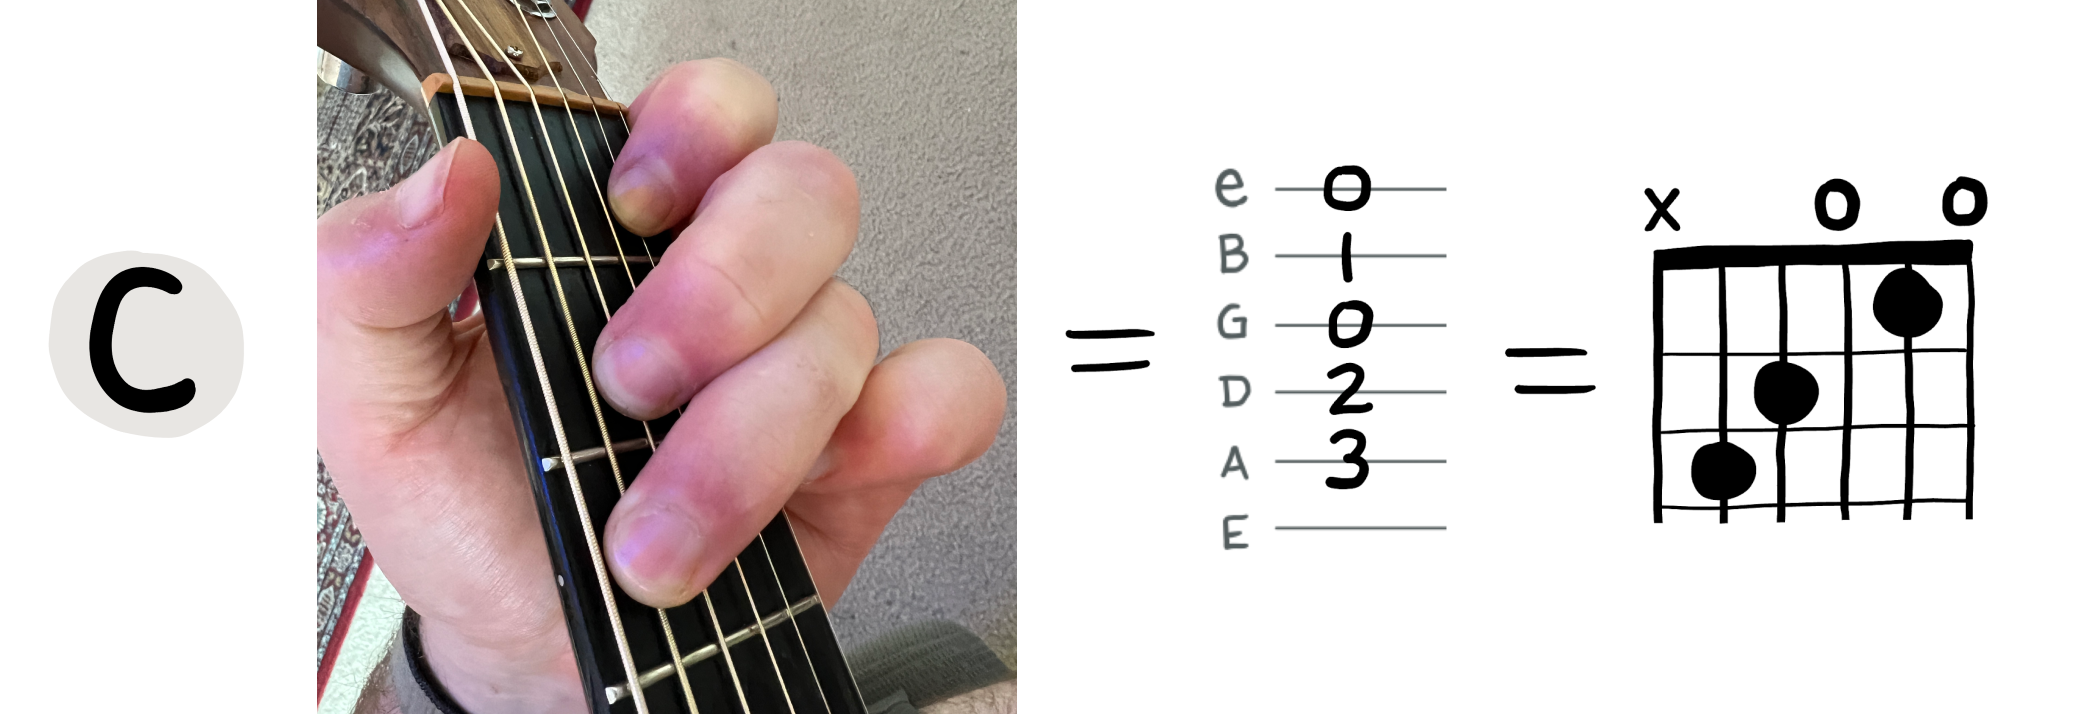
Here’s a C major chord shown via photograph, guitar tab, and chord chart:
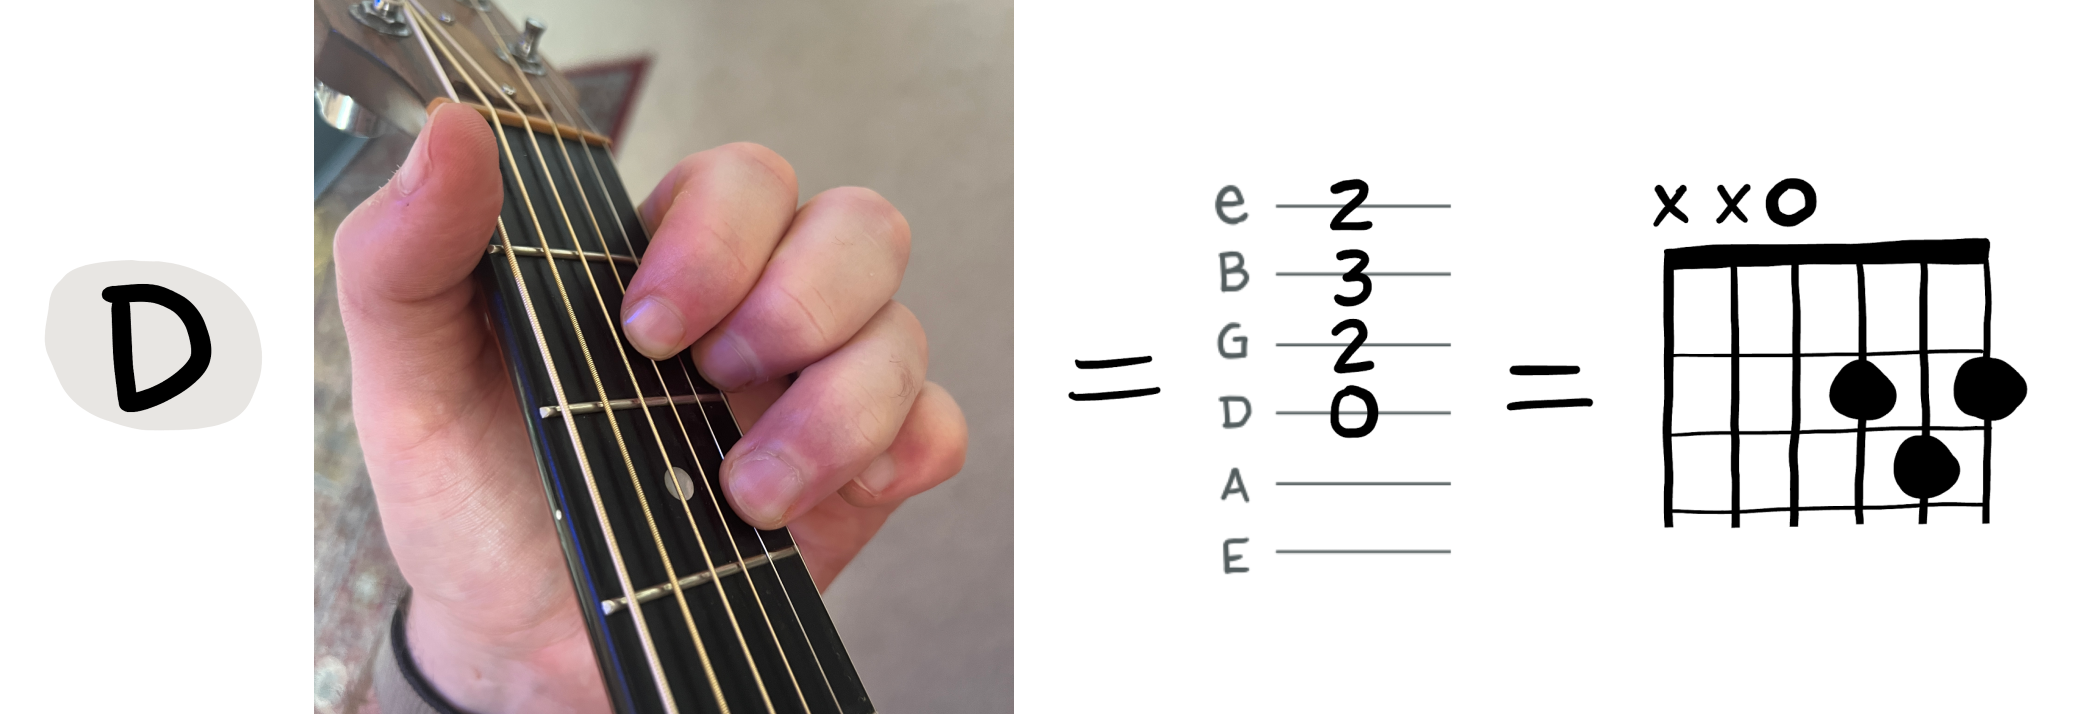
Likewise, here’s a D major chord shown in the same formats:
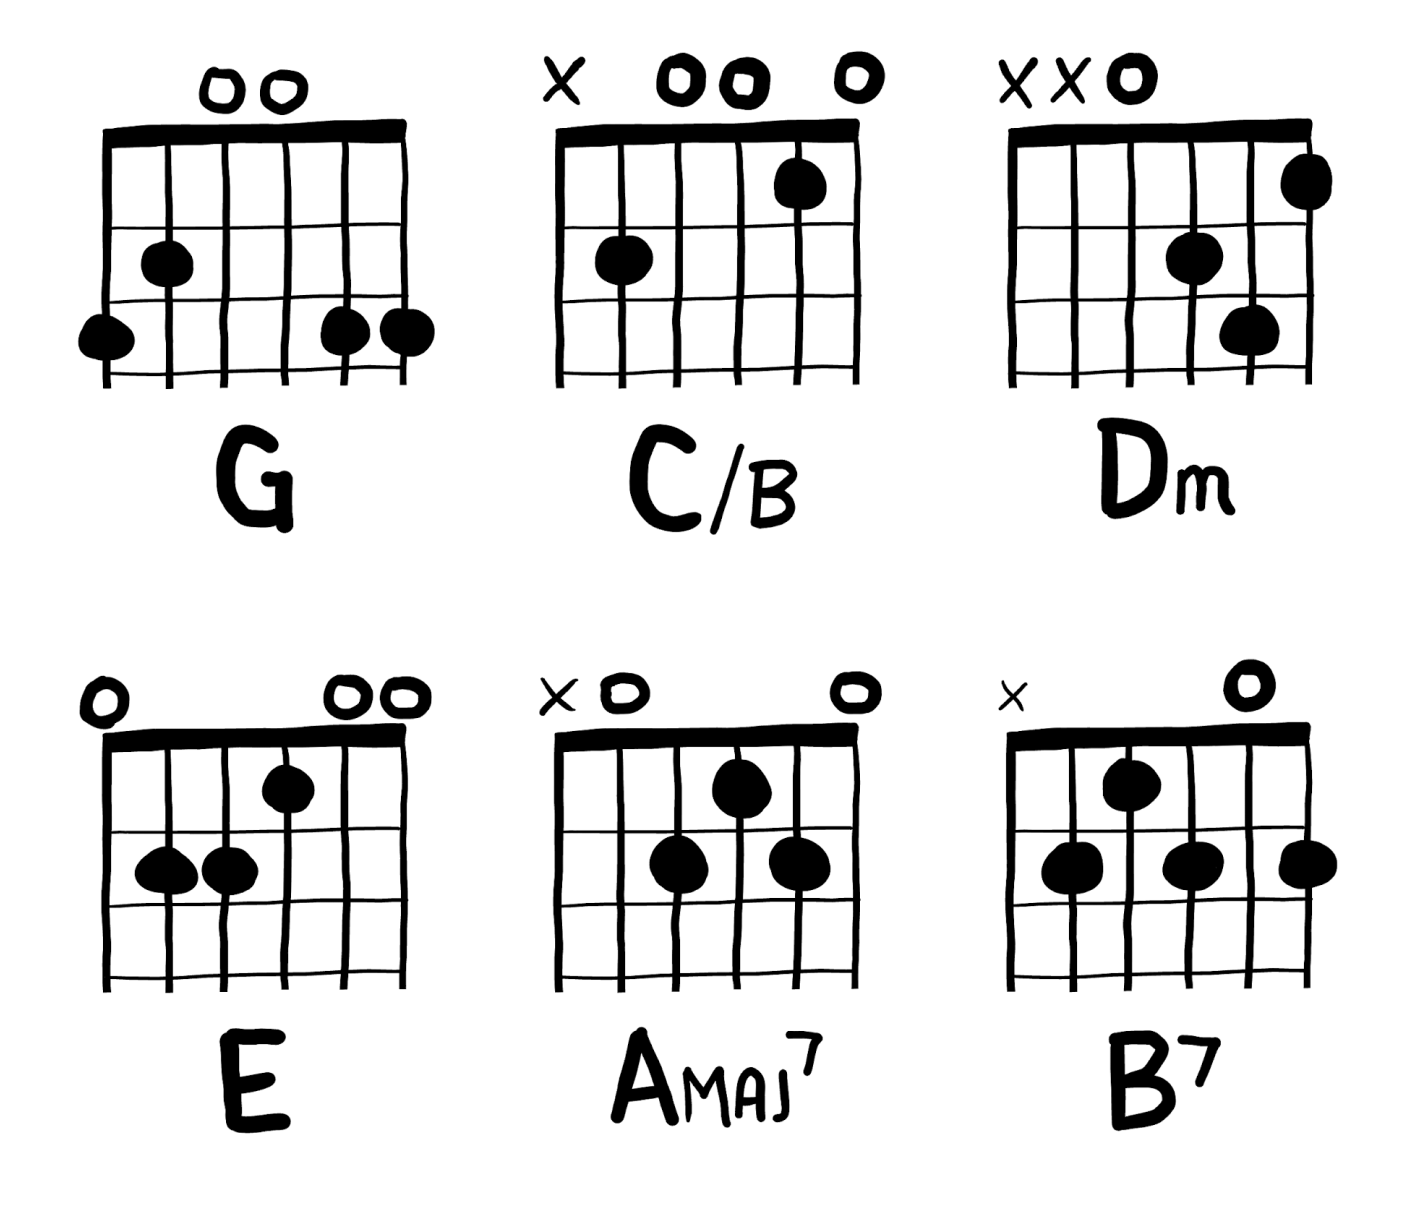
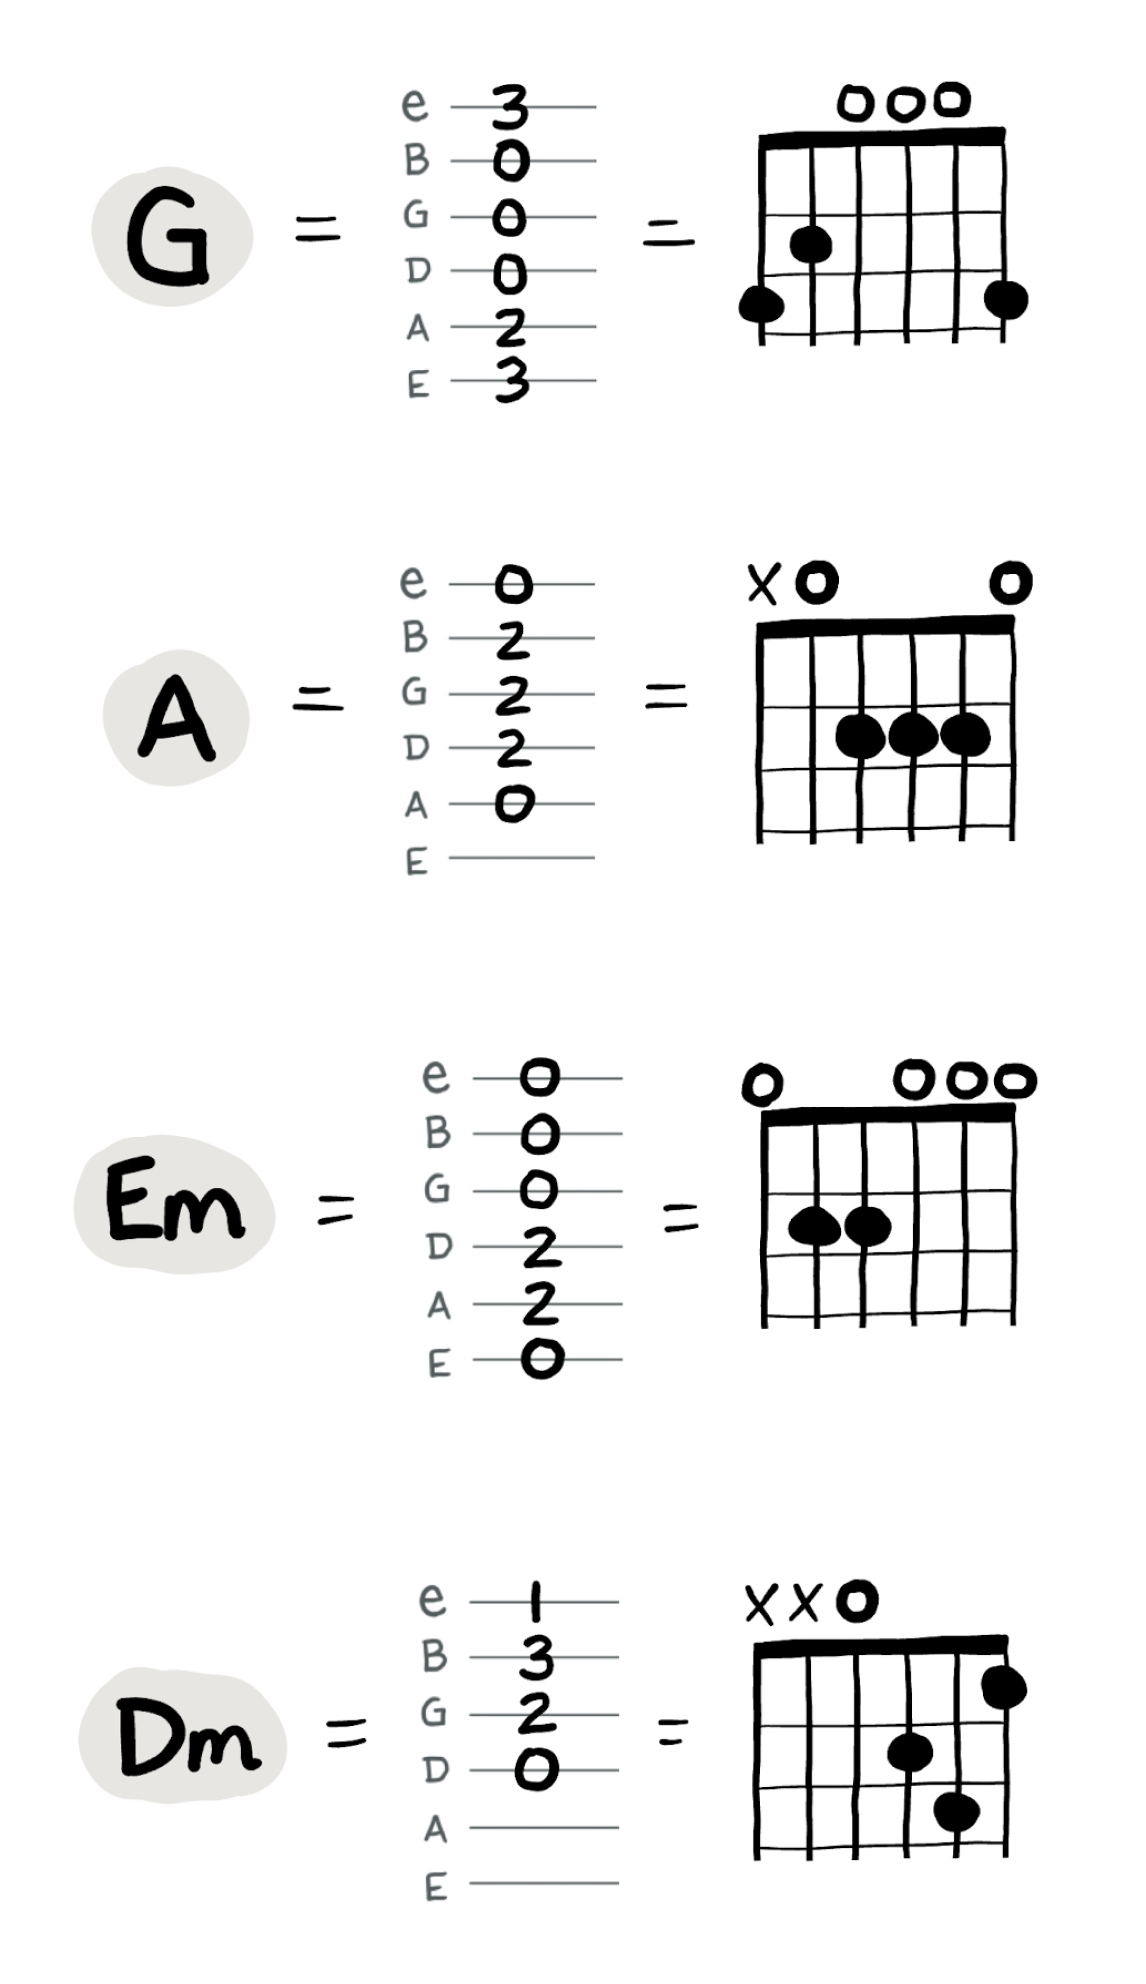
In this manner, we can convey all types of chords using chord charts:
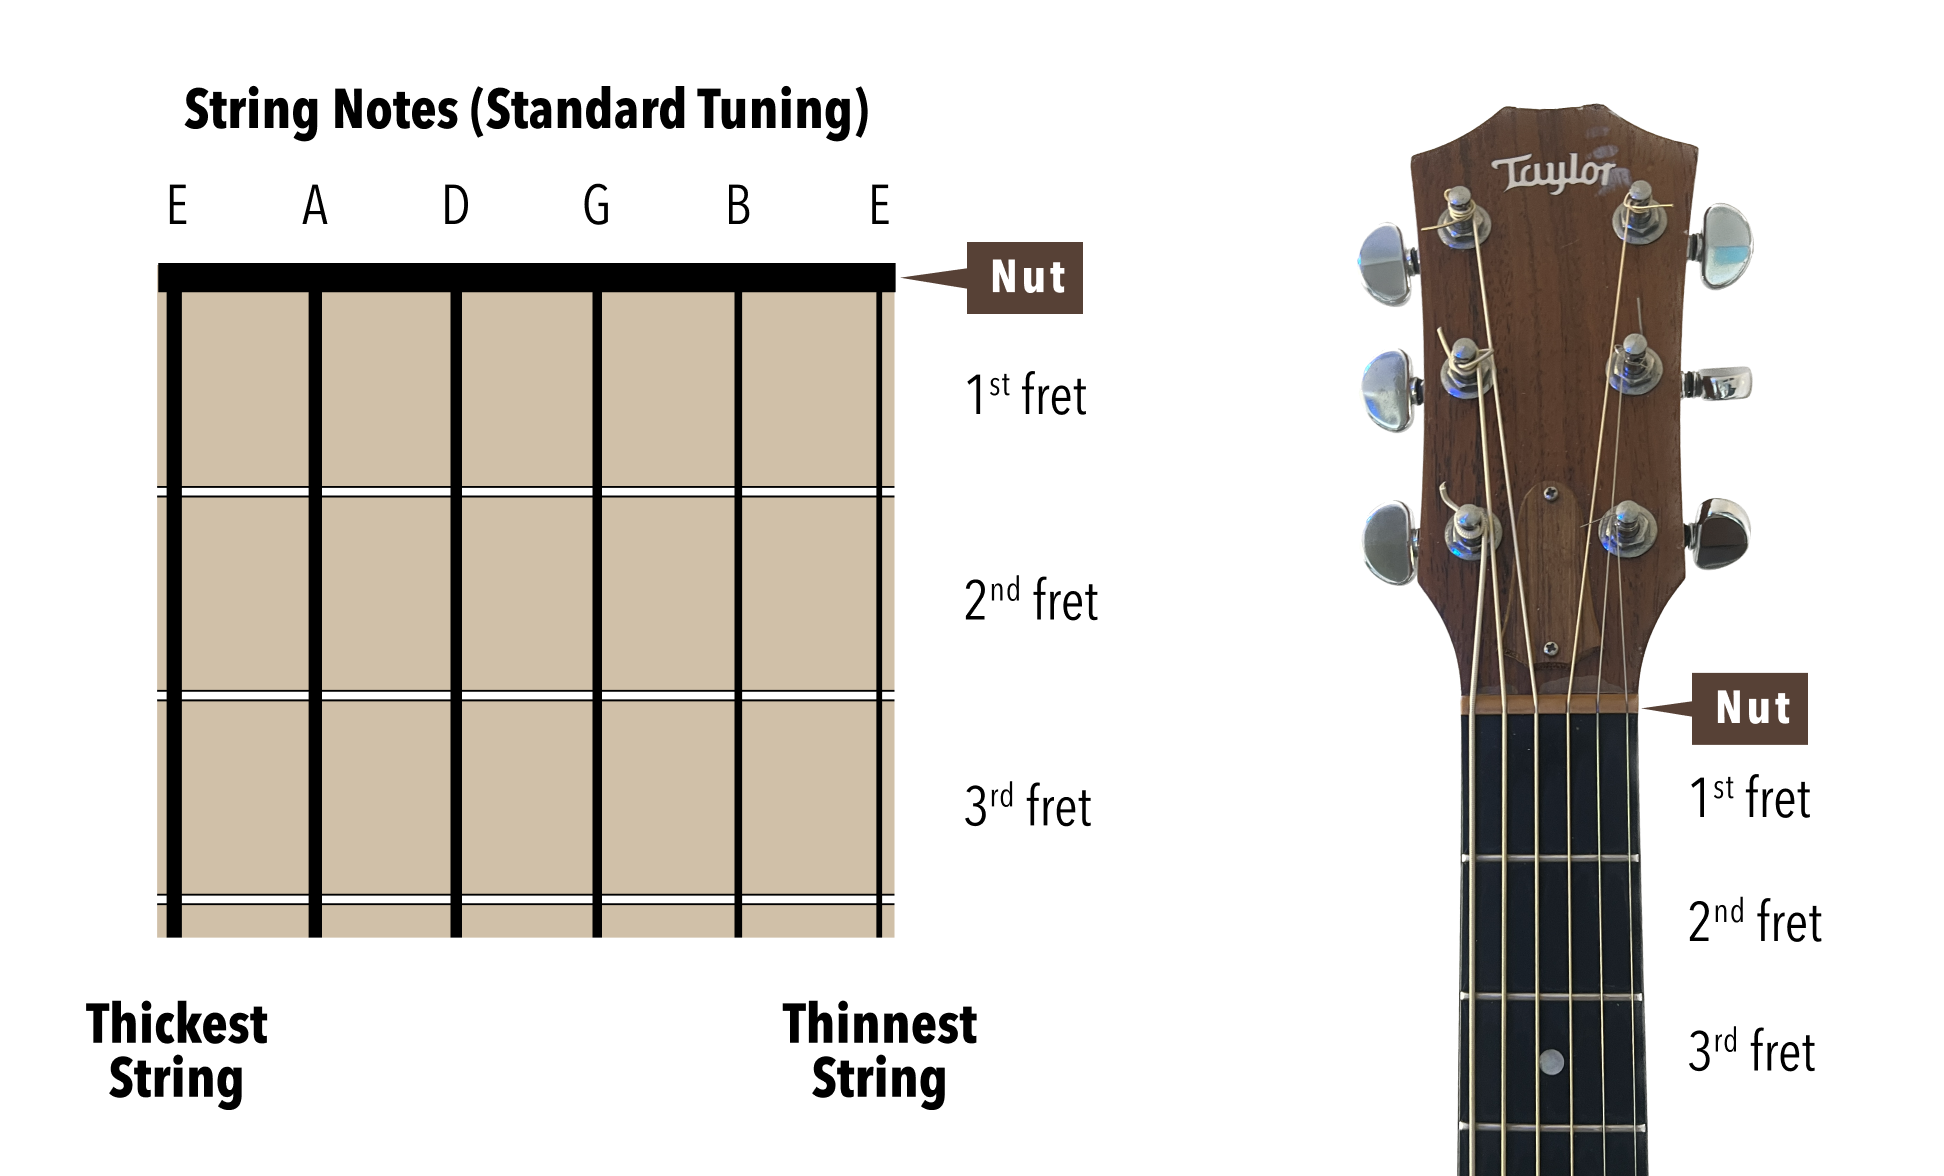
First, understand the orientation of this layout:
Usually (but not always), chord charts are showing the first 3-4 frets of the guitar. These are shown with horizontal lines. Look out for a thick line at the top, which represents the nut of the guitar:
Now that we understand the strings and frets, lets look at how to know what to play.
Again, here’s some common chords visualized in a few formats. Spend some time studying this until you can understand how chord charts work.
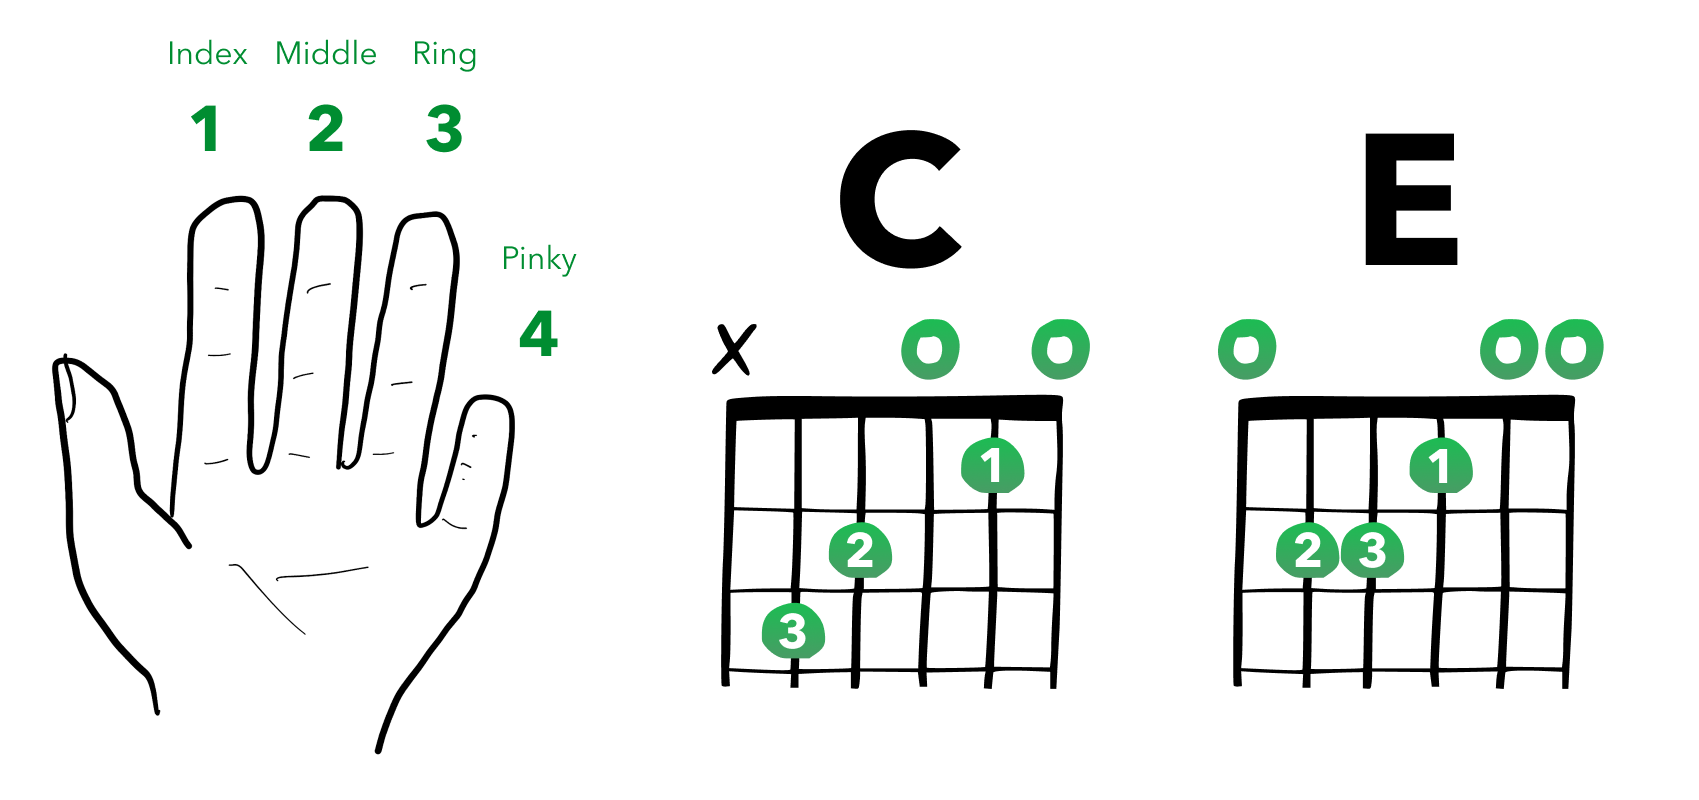
Sometimes — but not always — chord charts will include numbers written on top of each large dot. This can be a way to convey fretting hand finger position. For example:
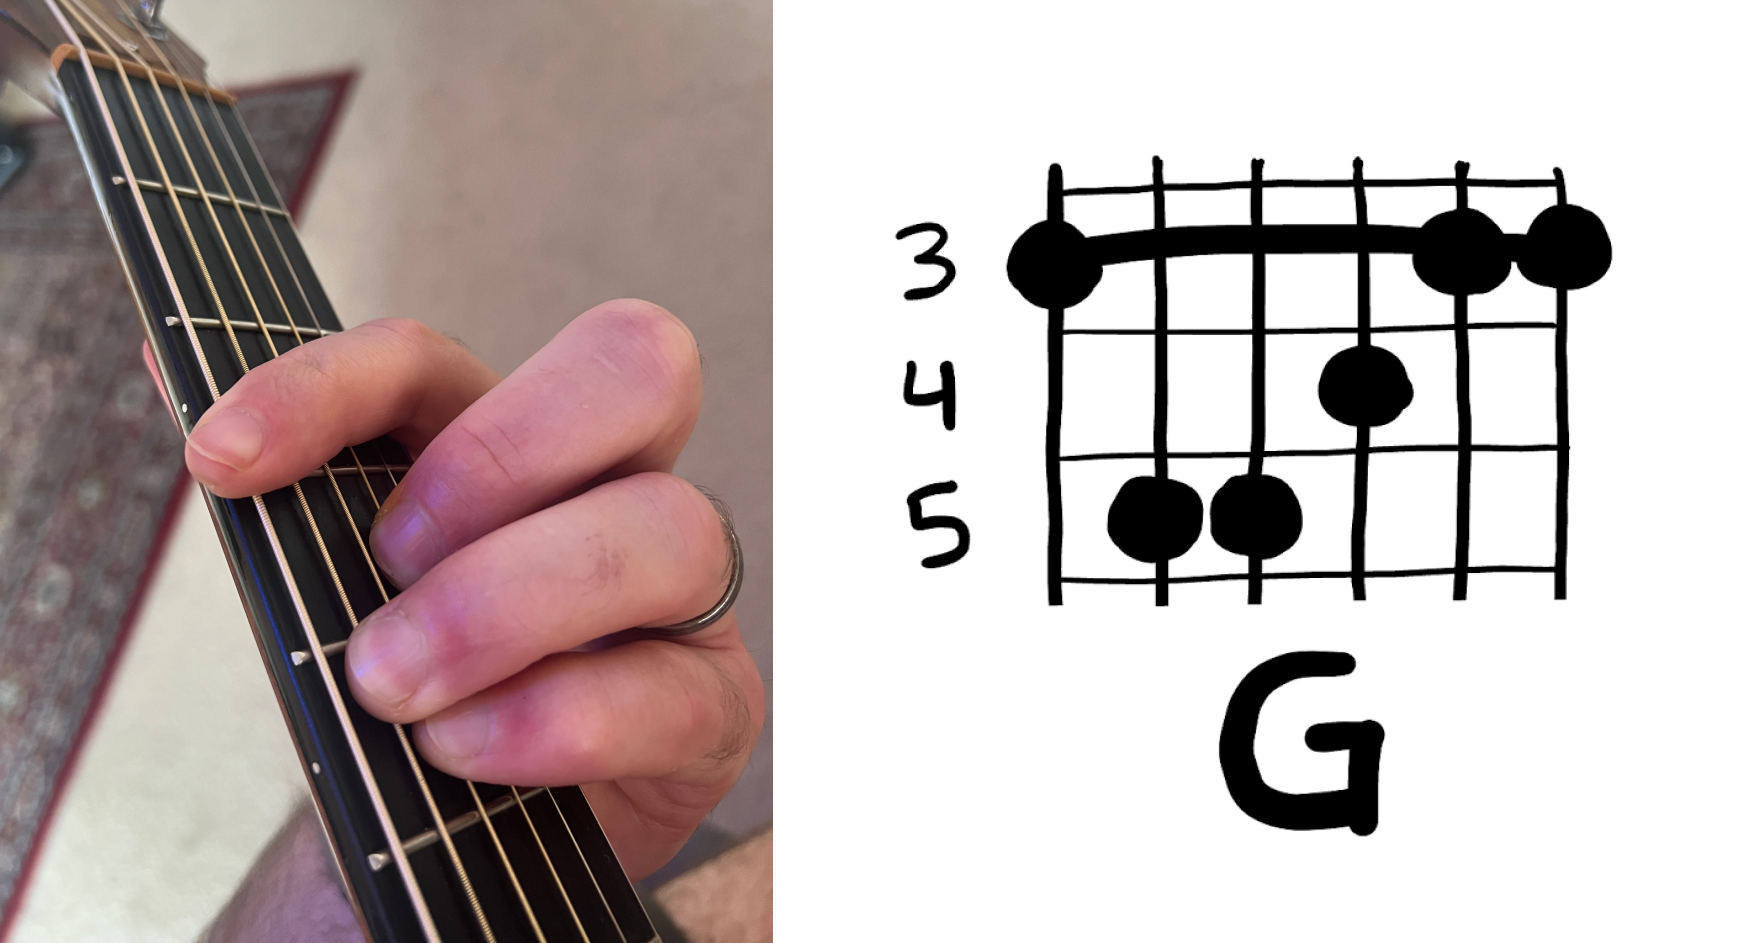
Sometimes, chord charts are used to show chords up the neck, far away from the nut of the guitar. In these cases, a number will be written to the left or right of the chart — letting you know which frets you’re looking at:
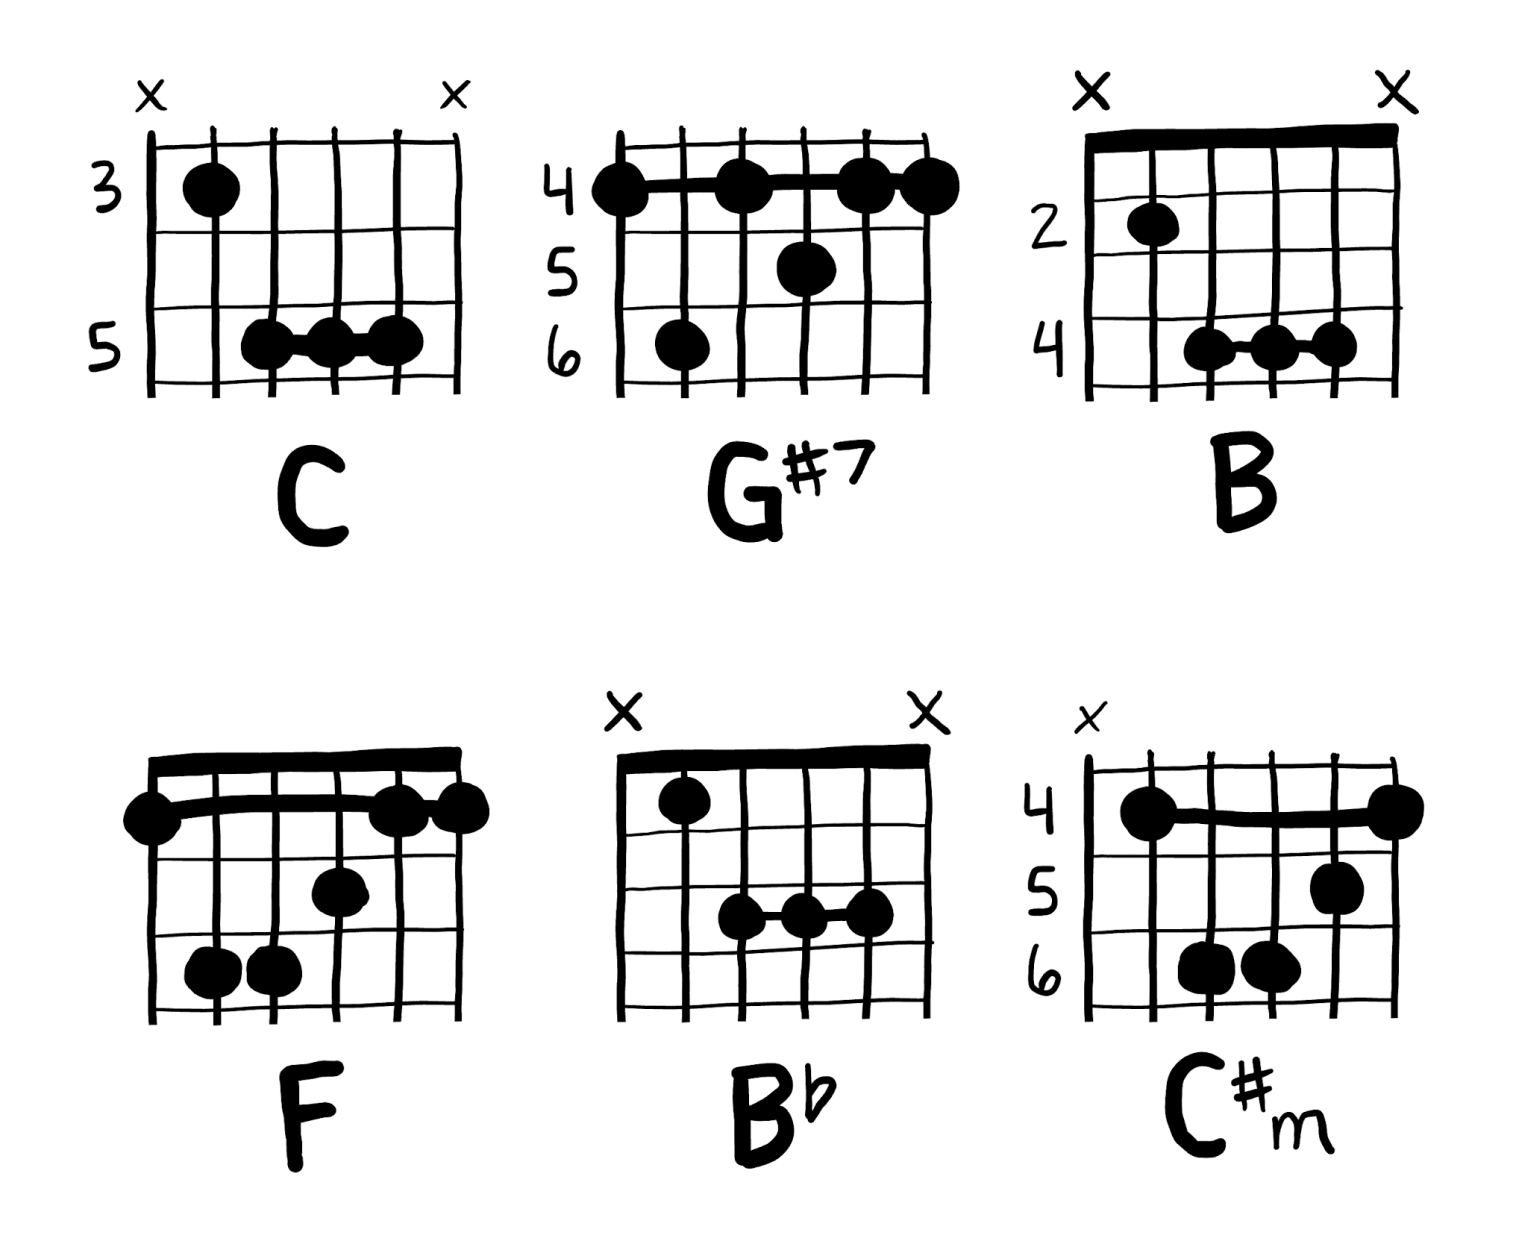
Some chords require you to play multiple notes with a single finger – which is referred to as barring (e.g. barre chords). In chord charts, this is often visualized with a horizontal line that runs through all barred notes.
Here’s a few examples showing this. Which finger you use to barre the notes depends on context and personal preference! For instance, in the C, B, and B♭ chords here you can either use your fretting hand’s ring or pinky finger.
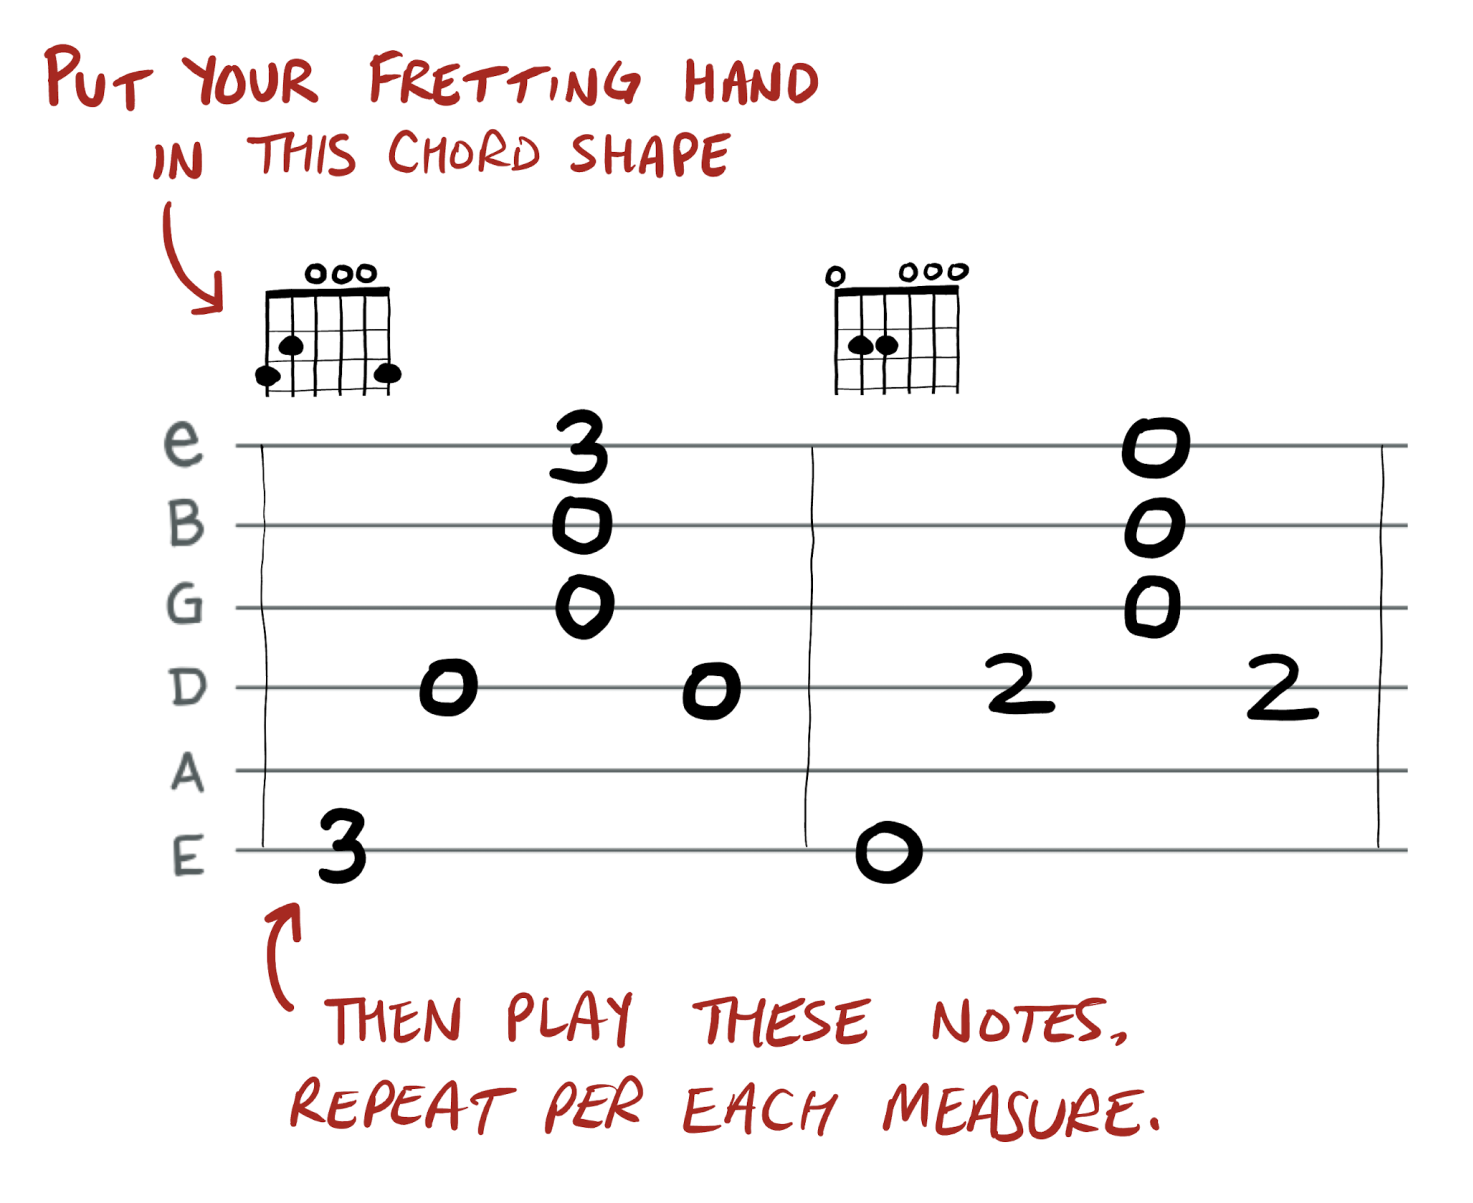
You may commonly see chord charts written directly above guitar tabs. This can be an incredibly helpful way of telling you how to position your fretting hand while approaching a tabbed sequence. Then, defer to the guitar tab to understand the order to play each string.
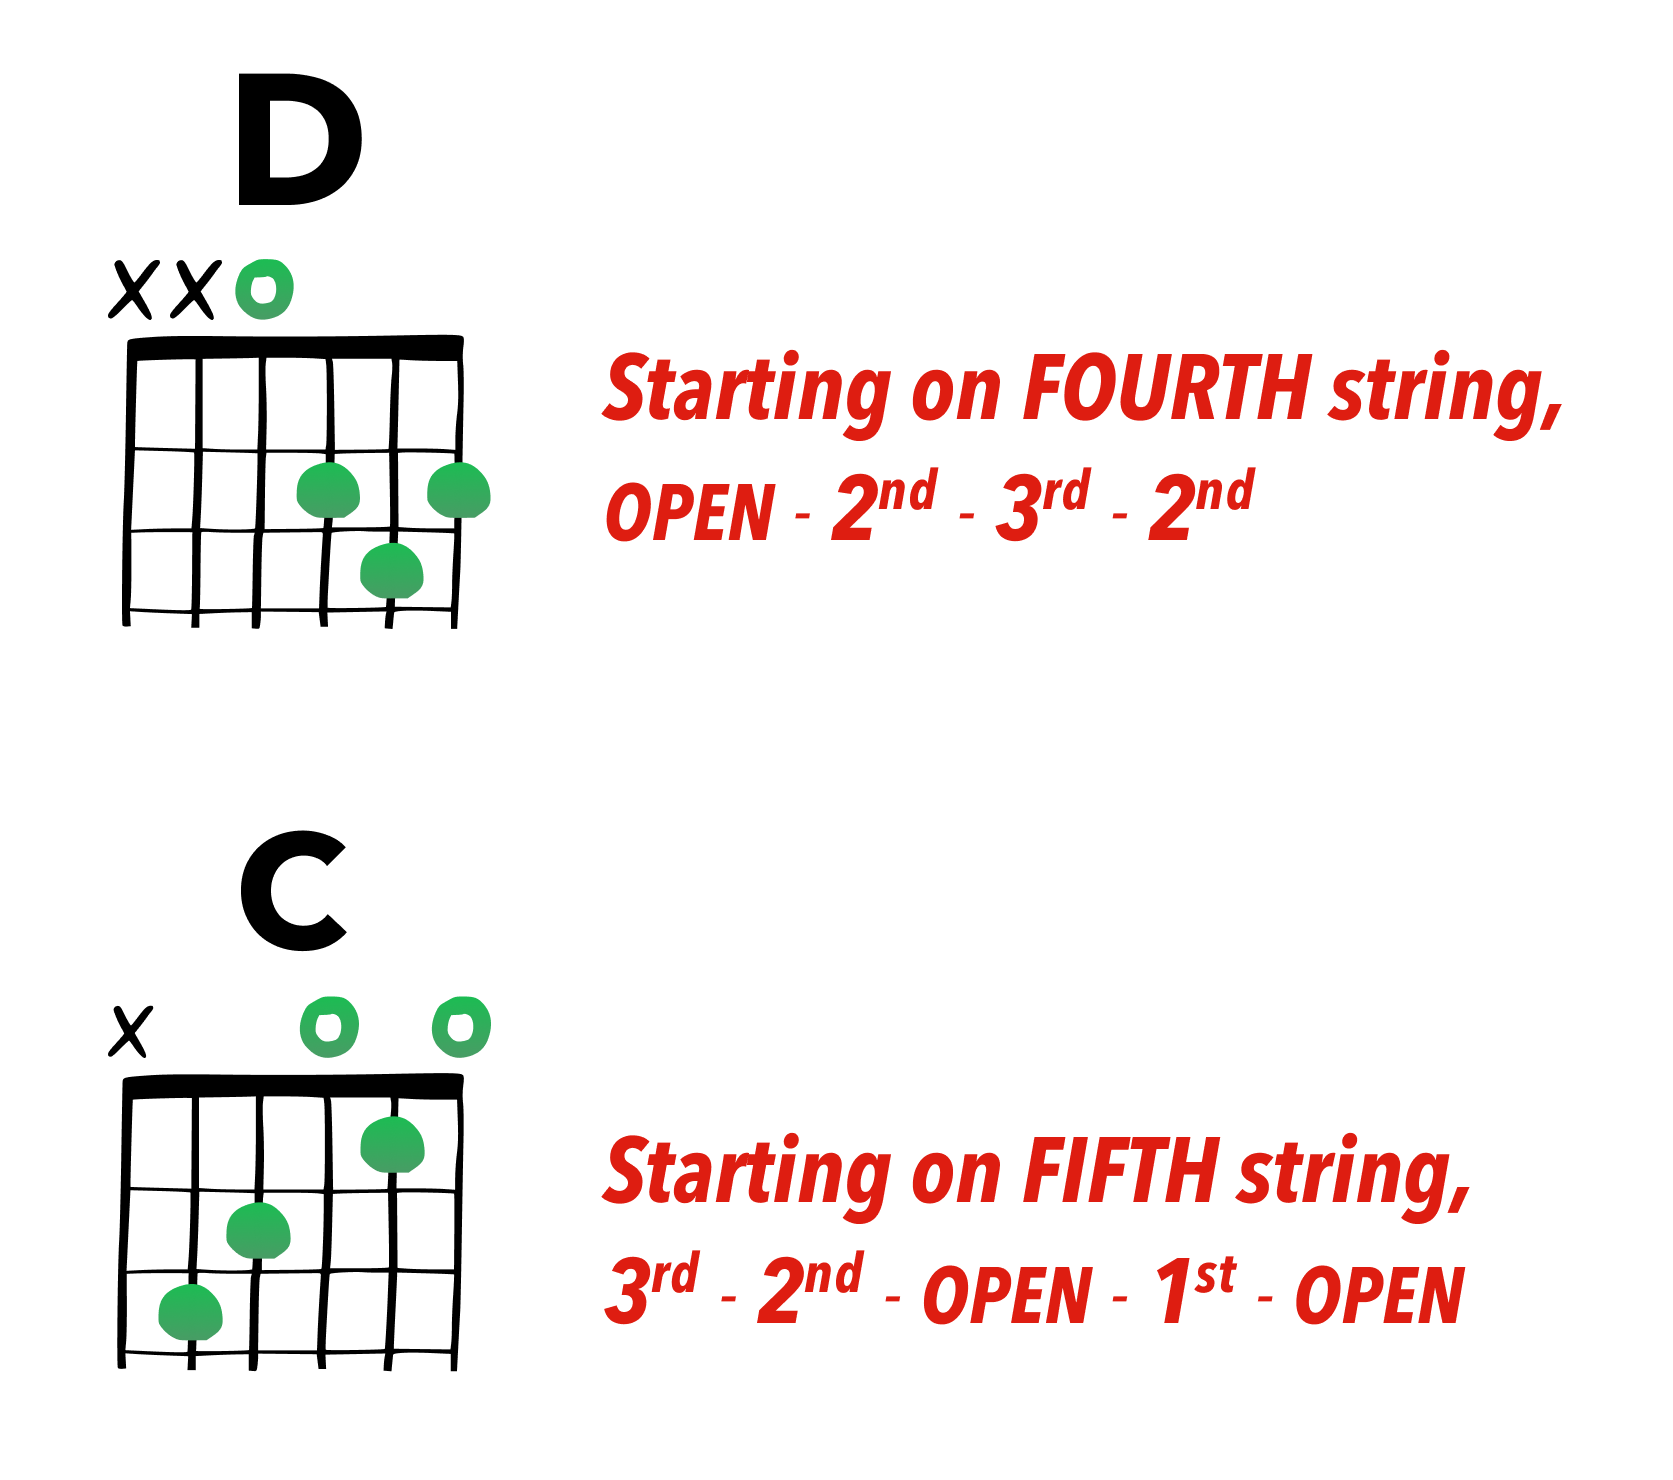
If you’re ever in a situation where you need to describe a chord chart with words, here’s how I do it.
Here’s what that looks like with common chords:
Next Lesson: How to Read Strumming Patterns →