Guitar tabs (short for tablature) are one of the most helpful & commonly used formats when it comes to learning guitar. They tell us exactly which notes to play, and in which exact order they should be played.
Here’s what they look like:
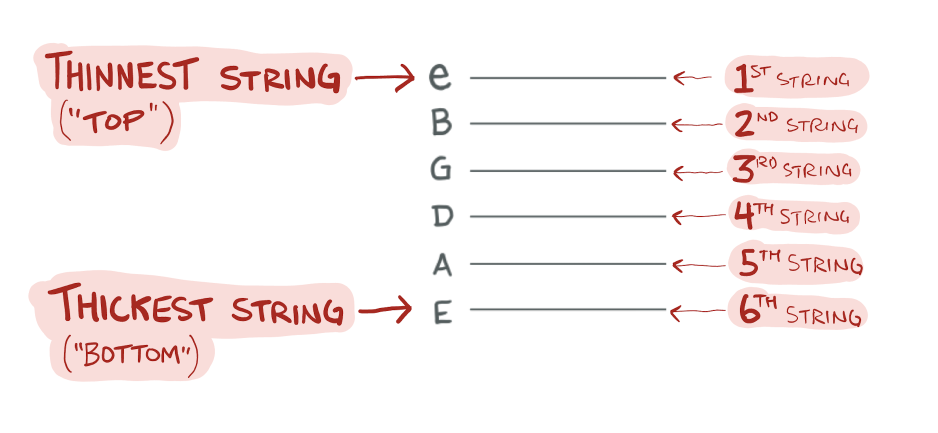
Guitar tabs appear as six horizontal lines, each of which represents a single string on the guitar.
I find it helpful to use your point-of-view as a guitarist, looking down at the fretboard, when memorizing what’s top vs. bottom. For example, consider the following vantage point:
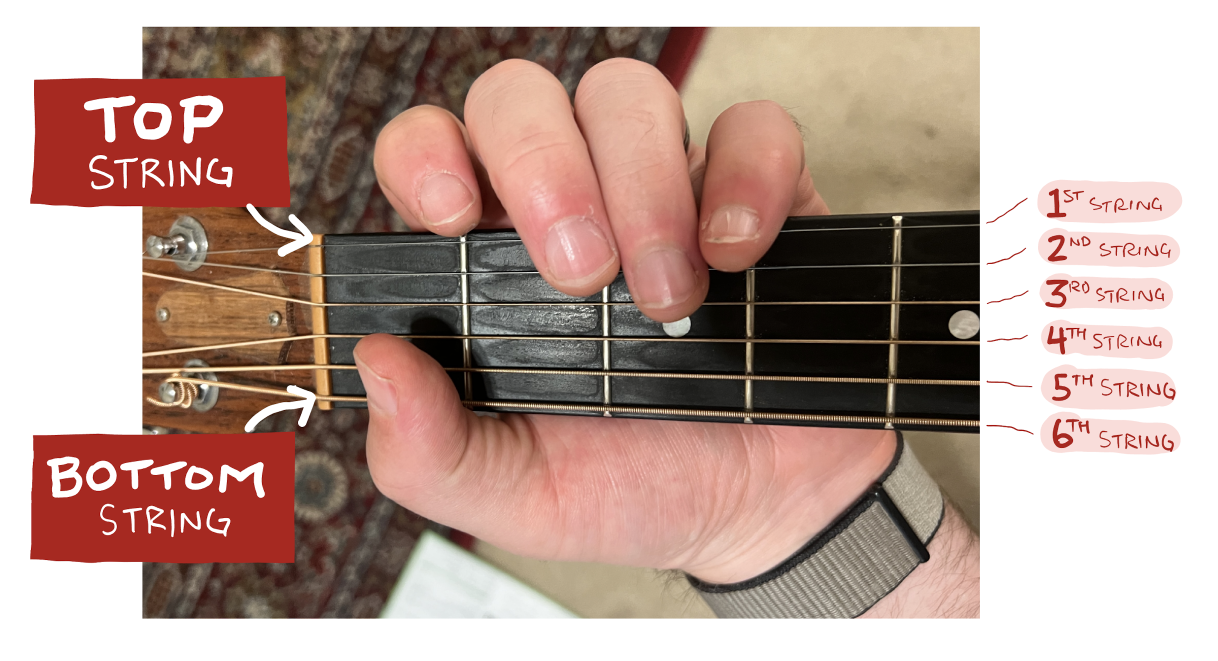
Above, the string at the top of your field of view matches the “top” string in guitar tabs. Likewise, the string at the bottom of your vantage point matches the “bottom” string in tabs. This may seem counter-intuitive (especially when we get to strumming directions) — but it remains the convention in guitar notation, and it’s worth remembering as-is.
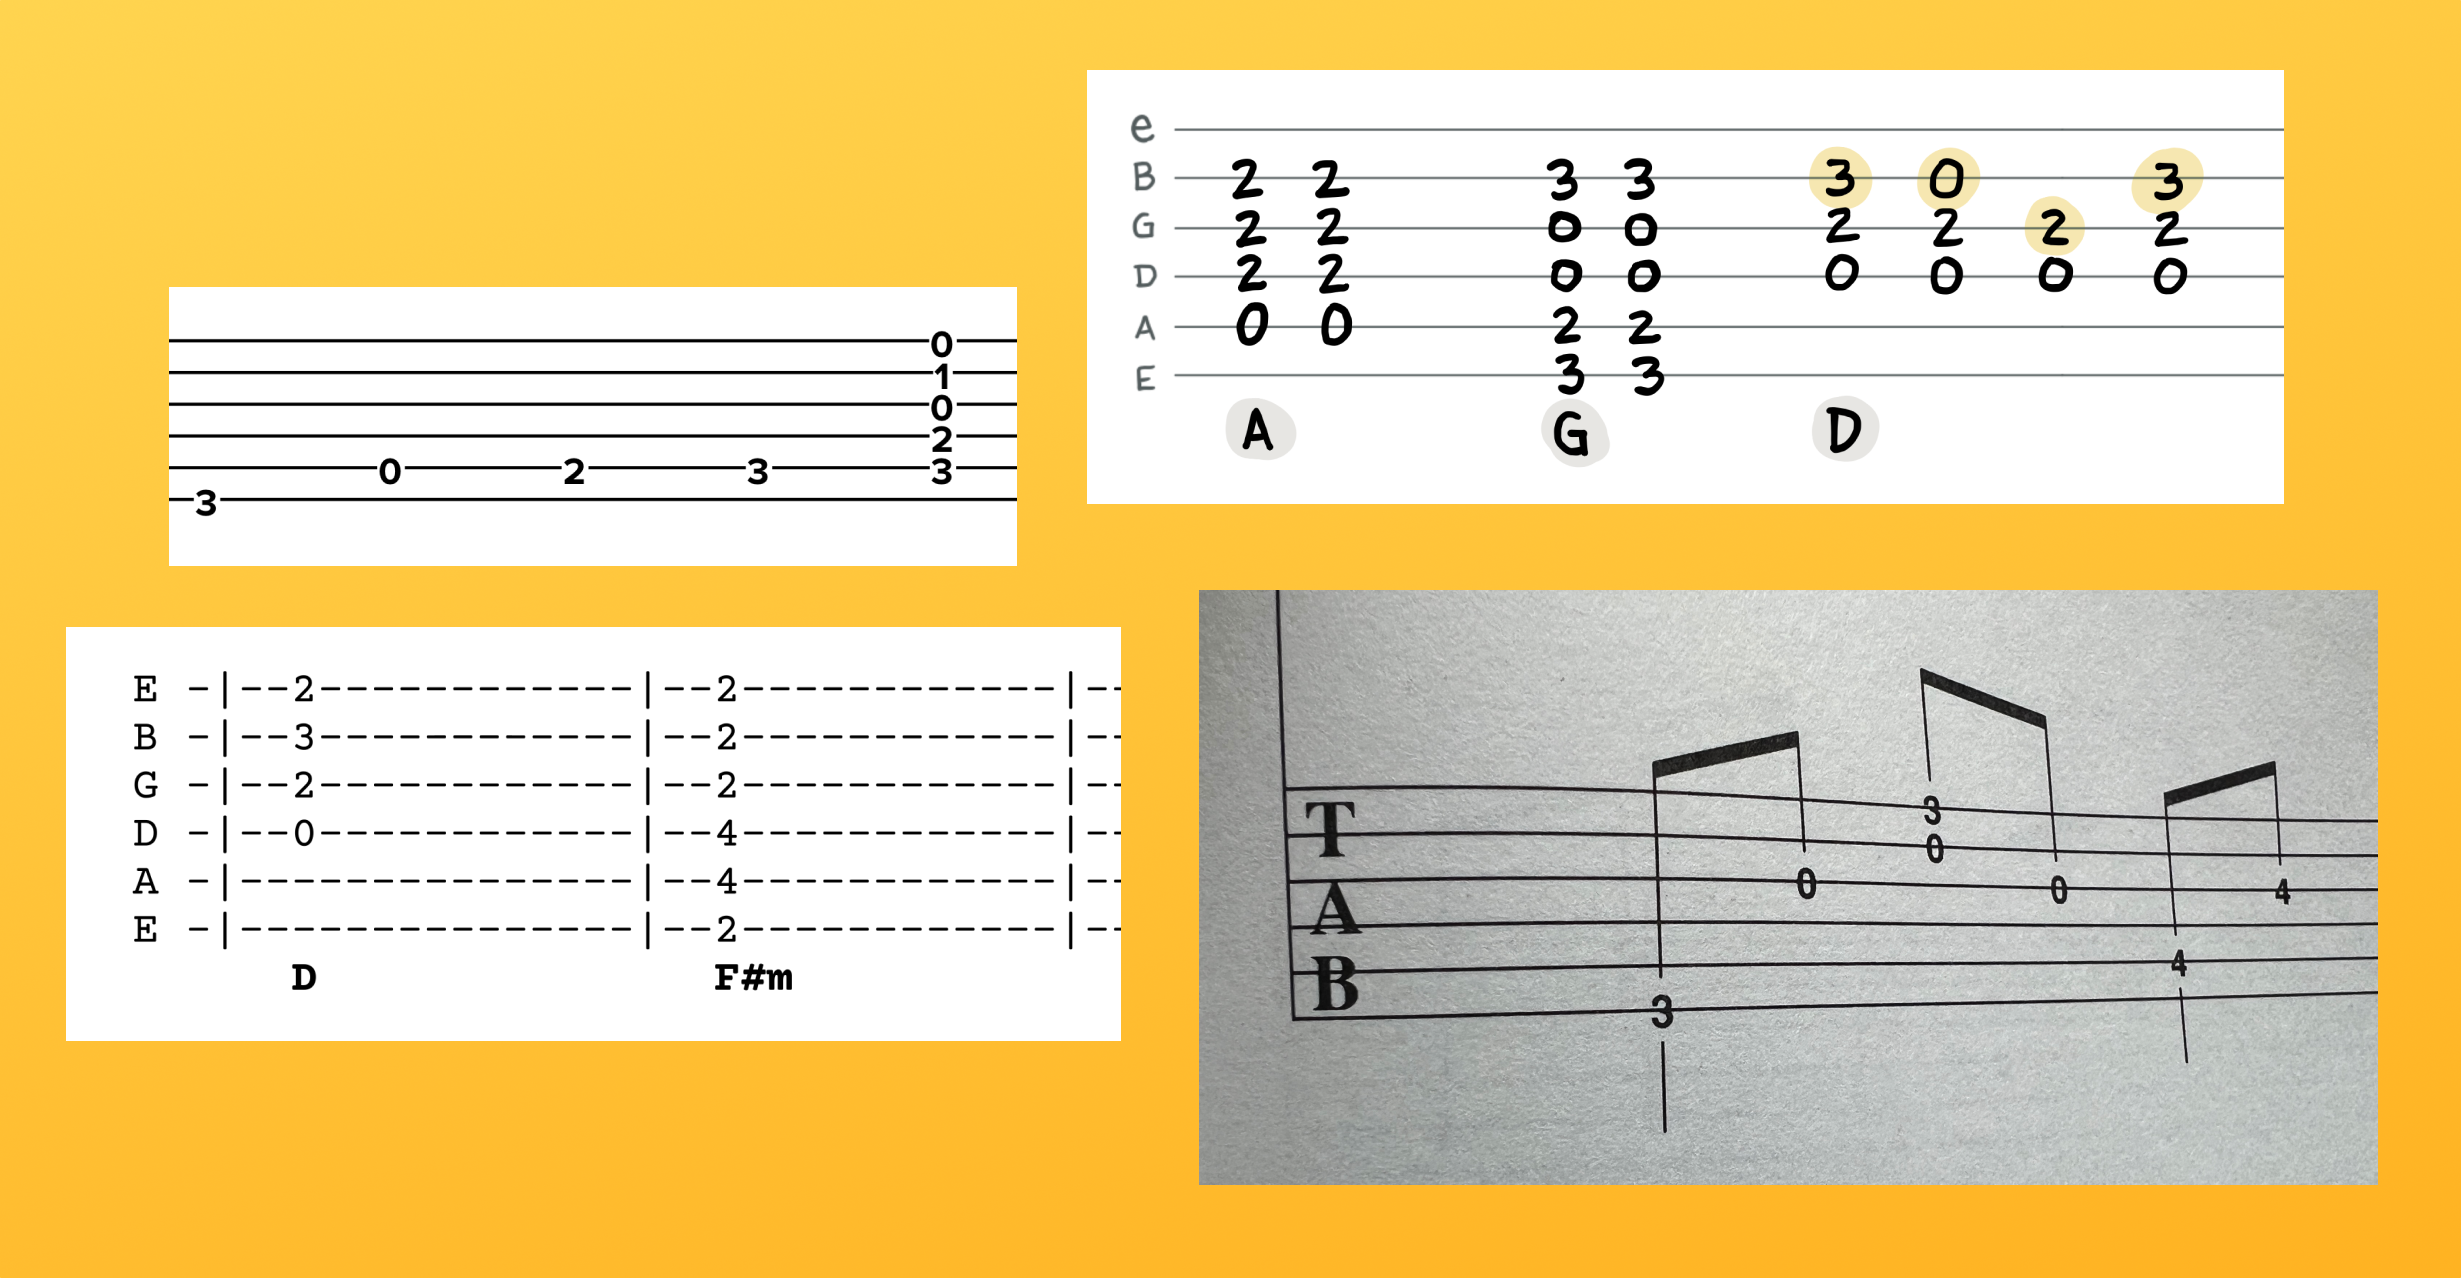
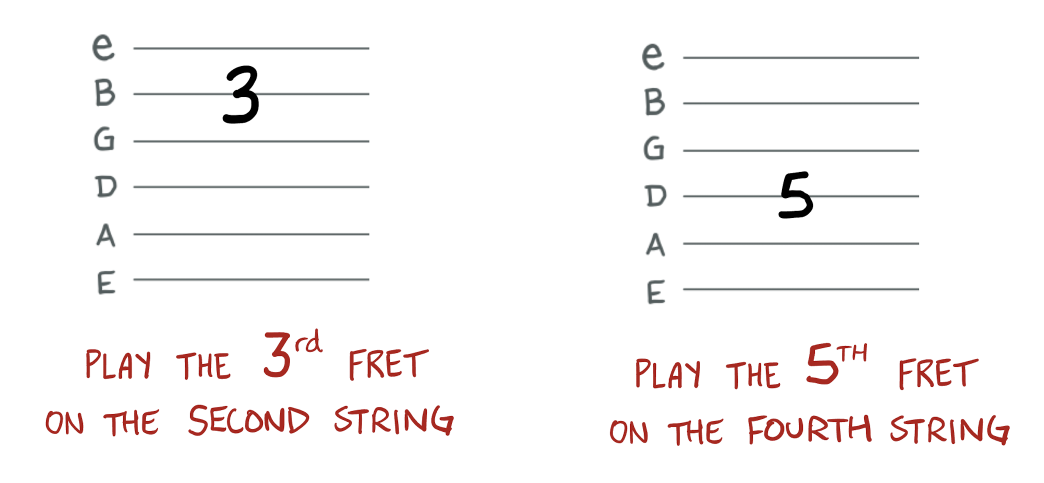
Guitar tabs will always have numbers written on some (or all) of the lines. These tell us which frets to push down, and on which string. For example, here’s two different tabs:
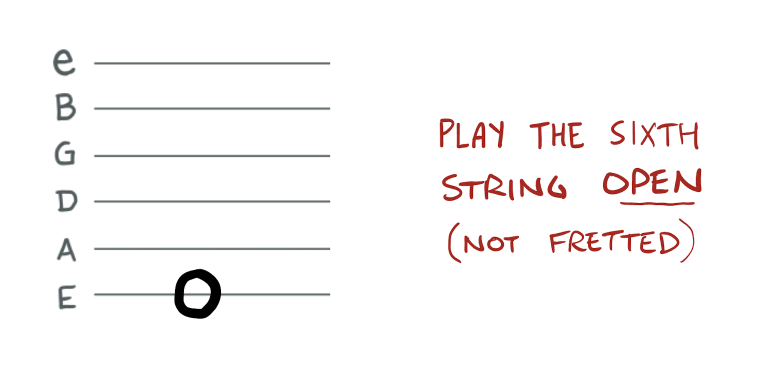
If you see a zero, it means play that string without fretting it. In other words, leave that string “open”. For example:
We read tabs from left to right — and it’s important you read all six strings at the same time! For example, in the following tab we’d visually scan starting at the left — and play as following:

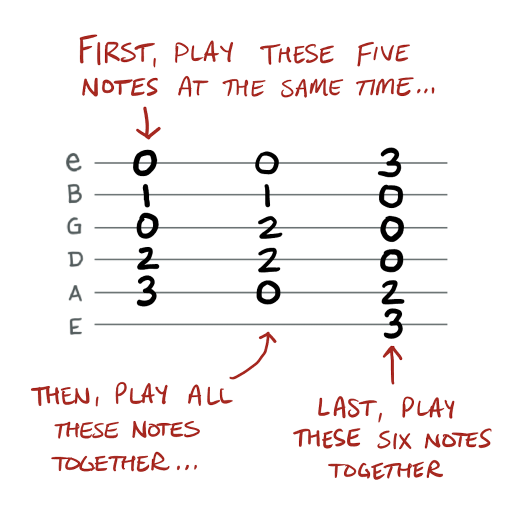
Tabs can also tell us play multiple strings at the same time.
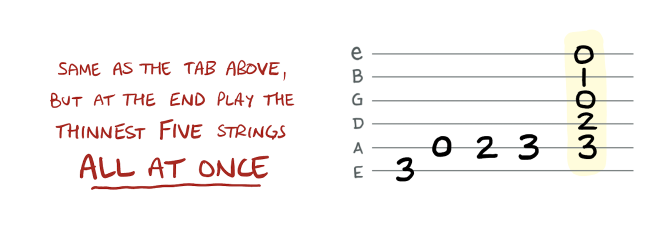
In the tab above, notice how the final thing we play is five strings at once. Because we read all the strings at the same time (from left to right), this checks out! We simply need to fret each of those notes, and then strum them all at the same time.
As you may have guessed, the multiple strings above represent a chord – C major in this case.
In some cases, guitar tabs might be used solely to communicate chord shapes:
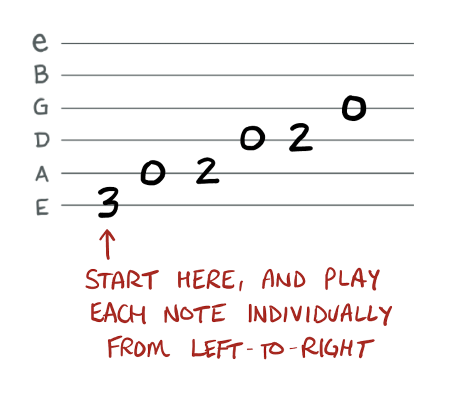
And in other cases, they’re used to show individual notes:
Both approaches work! And of course you can combine the two – e.g. having individual notes shown in tabs that also includes chords.
One of my biggest pieces of advice on this topic? Learn to recognize chord shapes within tabs. This may seem impossibly difficult at first, but with some practice it will become second nature. A great place to start is using the familiar open chords.
For example, here’s the 5 major chords that can be played in open position:
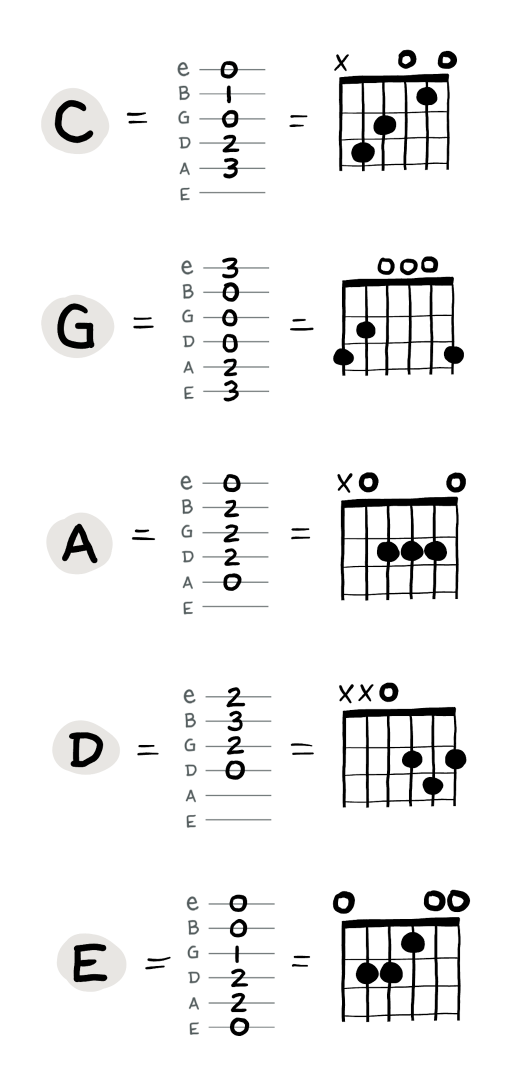
And here’s the 3 minor chords in open position.
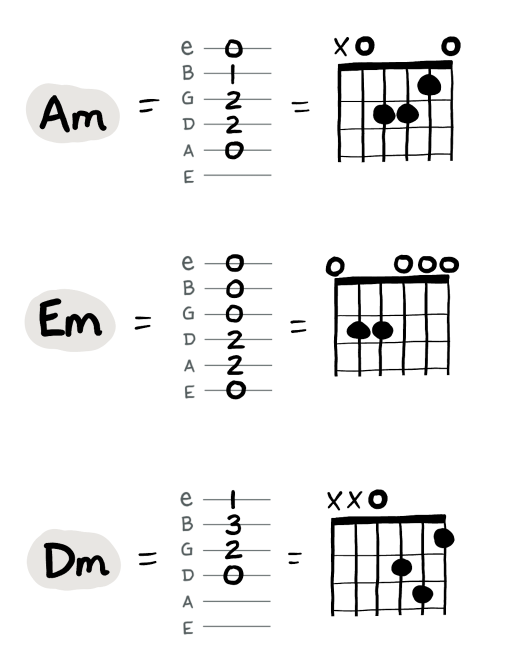
With this in mind, consider the following tab. Do you recognize a certain common chord shape?
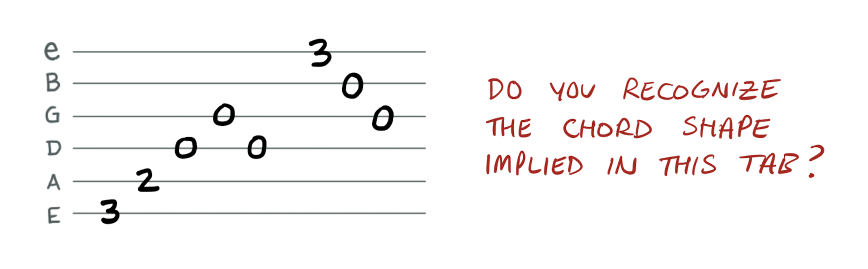
In general, I find it helpful to imagine the numbers (in each measure, or musical phrase) horizontally squished together. This can often reveal the underlying chord shapes that a tab is based on. This can help tell us which chord shape our fretting hand should be positioned in:
In their simplest form, guitar tabs don’t tell you how long to play each note – or, how long to wait between each note. Sometimes this can be frustratingly unclear, but there are a few conventions sometimes used by myself and others.
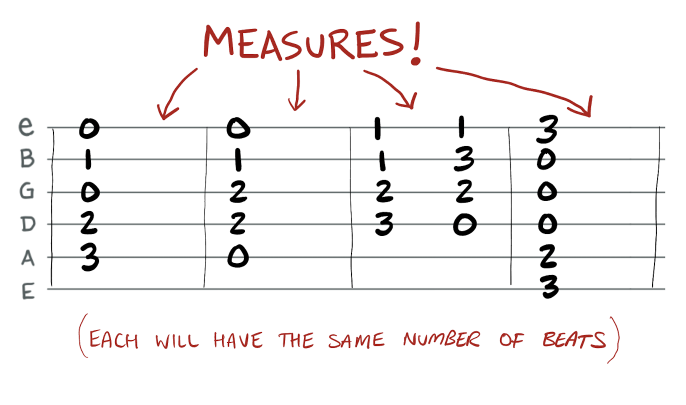
Measures (or “bars”) can be written with a single vertical line. These typically denote when a measure ends. If implemented with consistency, these help give an idea of the general speed at which we should move through a tab.
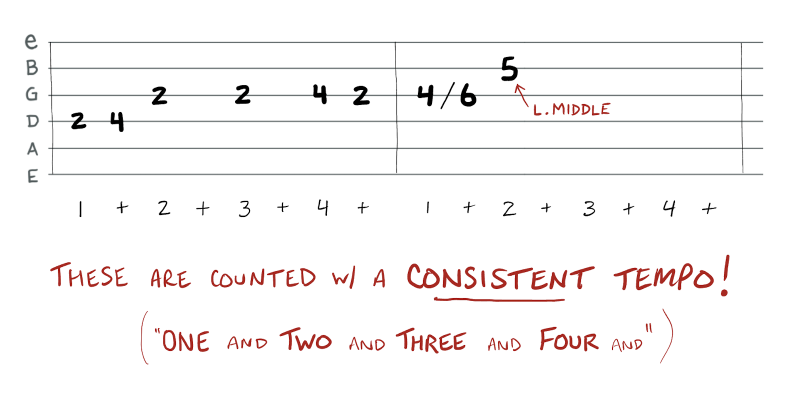
Counting can be added to tabs via the numbered beats being written below the tabs. These are typically spaced in a consistent manner, allowing you to literally count your way through the tab – from left to right. The tab numbers (on each of the six strings) will vertically align with the beat when they should be played:
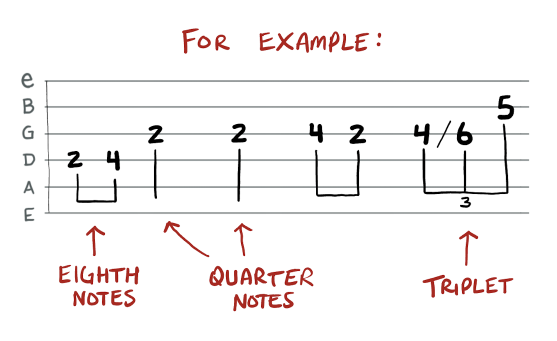
Stemmed tablature is sometimes used as well – where each numbered note has stems from standard notation. This is quite helpful for conveying quarter notes vs. eighth notes, triplets, and even rests.
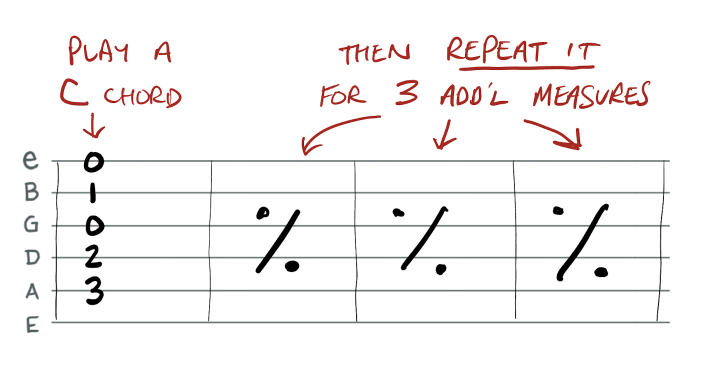
Repeated measures are typically written with the repeated measure symbol. This simply tells us this measure should repeat what came before. This can save you time when writing out a complicated arrangement which features chunks that repeat.
Tabs & Finger Positions
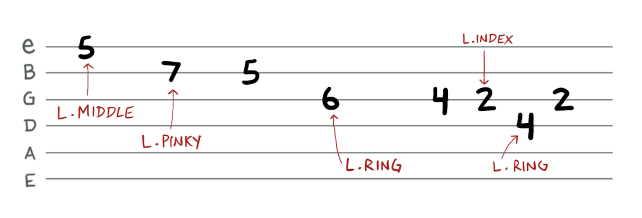
Another things tabs typically lack is telling you which fingers to use when fretting notes, or when fingerpicking. Fortunately, I include this in many of my tabs via handwritten annotation:
Tabs & Chord Charts
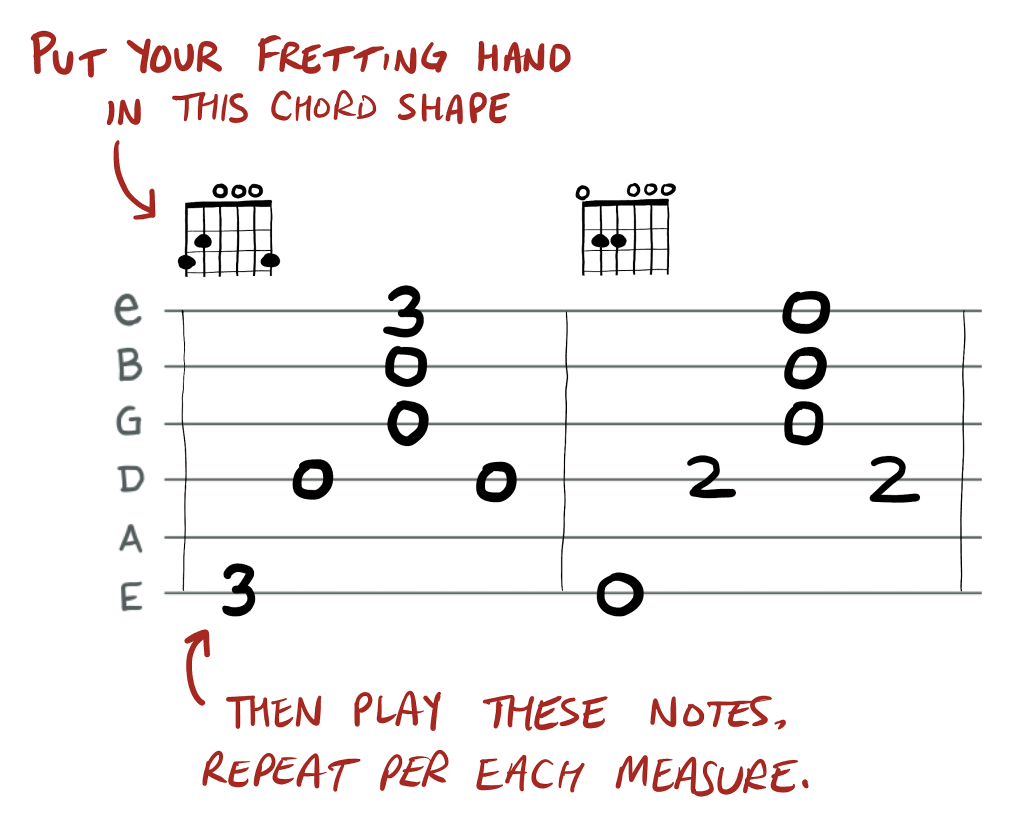
It’s quite common for tabs to show chord charts, either above or below the tab. These may convey suggested fretting-hand placement (to be used when tackling the tabbed notes), or they may denote the assumed chord tonalities. For example, if playing rhythm guitar along with your brother – you might just worry about strumming the chords (using the chord charts for reference) while he plays the individual notes that are tabbed out.
Tabs & Strumming
Strumming and tabs aren’t a perfect fit for each other – since a “down” strum with your strumming hand equates to an upward direction in the tabs. If we drew this arrow across the strings, it would be confusing. This is generally avoided by guitar teachers, for the most part.
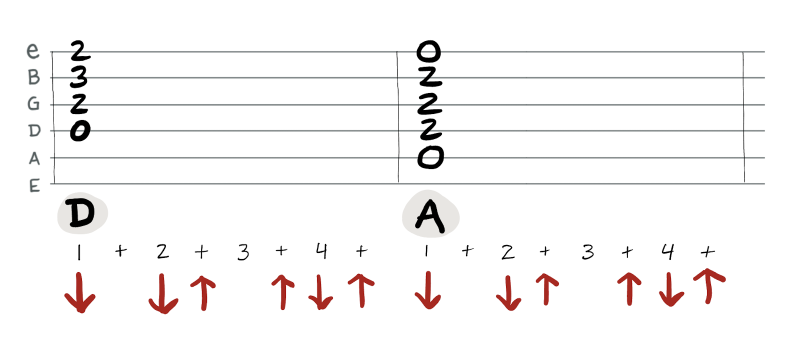
However, it is quite common to see strumming direction annotated under the tabs. For example, here’s how I might convey strumming information. Notice how well this works when precise counting is included:
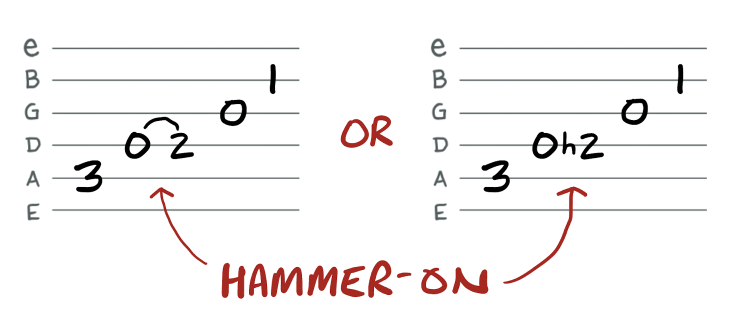
Hammer-ons are communicated with either an “h” between two numbers, or alternatively via sideways parentheses (also known as a “slur”) connecting two notes.
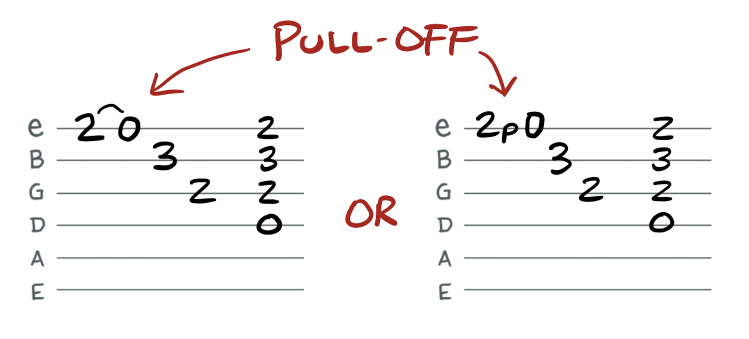
Pull-offs are written with a “p” between two numbers, or alternatively via sideways parentheses (also known as a “slur”) connecting two notes.
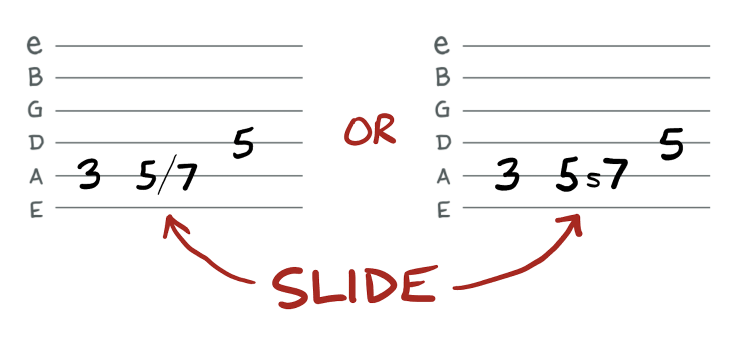
Slides are communicated via the letter “s” between two numbers. You might also may see a forward slash “/” used to denote an upward slide, and a backslash “\” used to denote a downward slide.
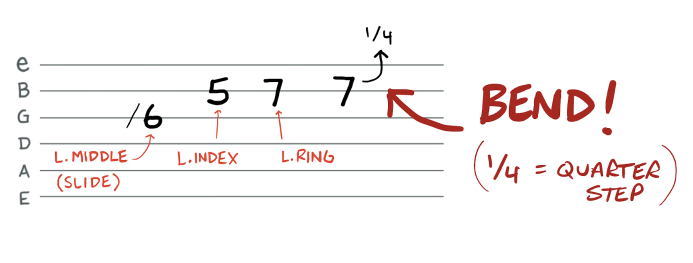
Bends are sometimes communicated with the letter “b” – which means the note you just played should be bent “upward” in pitch. You might also see bends written with a curved arrow – which often includes how far to bend the note (1/4 step, 1/2 step, etc).
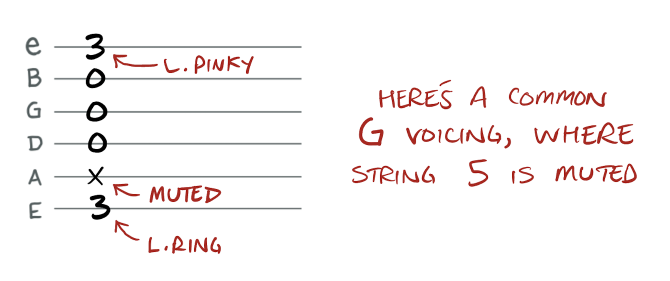
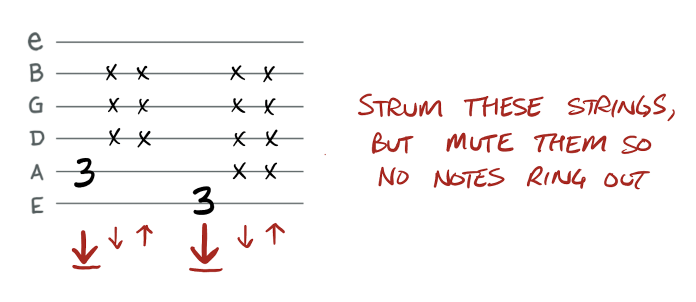
Muted strings are communicated with an “x” symbol. This typically tells us that this specific string should be played, but should not be fretted. In other words, you’ll want to lean one of your fretting-hand fingers into the string without pressing it down firmly. This will deaden the string, causing it to not play a note. Sometimes mutes are used for affect – other times they’re included out of necessity, based on the other notes being played.
Next Lesson: How to Read Chord Charts →